
There is something timeless about a perfectly baked classic brownie. With its shiny, crackly top, rich chocolate aroma, chewy edges, and irresistibly fudgy center, a homemade brownie has a way of bringing comfort with every bite. Whether you’re baking for a family gathering, preparing desserts for a party, satisfying a late-night chocolate craving, or simply looking for an easy homemade treat, classic brownies never disappoint. They are one of those desserts that look simple but can be transformed into something truly unforgettable when made with the right ingredients and techniques.
In this complete guide, you’ll learn everything you need to know about creating bakery-quality classic brownies from scratch. Beyond simply following a recipe, you’ll understand why each ingredient matters, how every baking step contributes to the final texture, and which professional tips can elevate your brownies from good to extraordinary. By the time you’re finished reading, you’ll have the confidence to bake brownies with perfectly crisp tops, rich chocolate flavor, and that signature fudgy texture every chocolate lover dreams about.
Ingredients for Classic Brownies
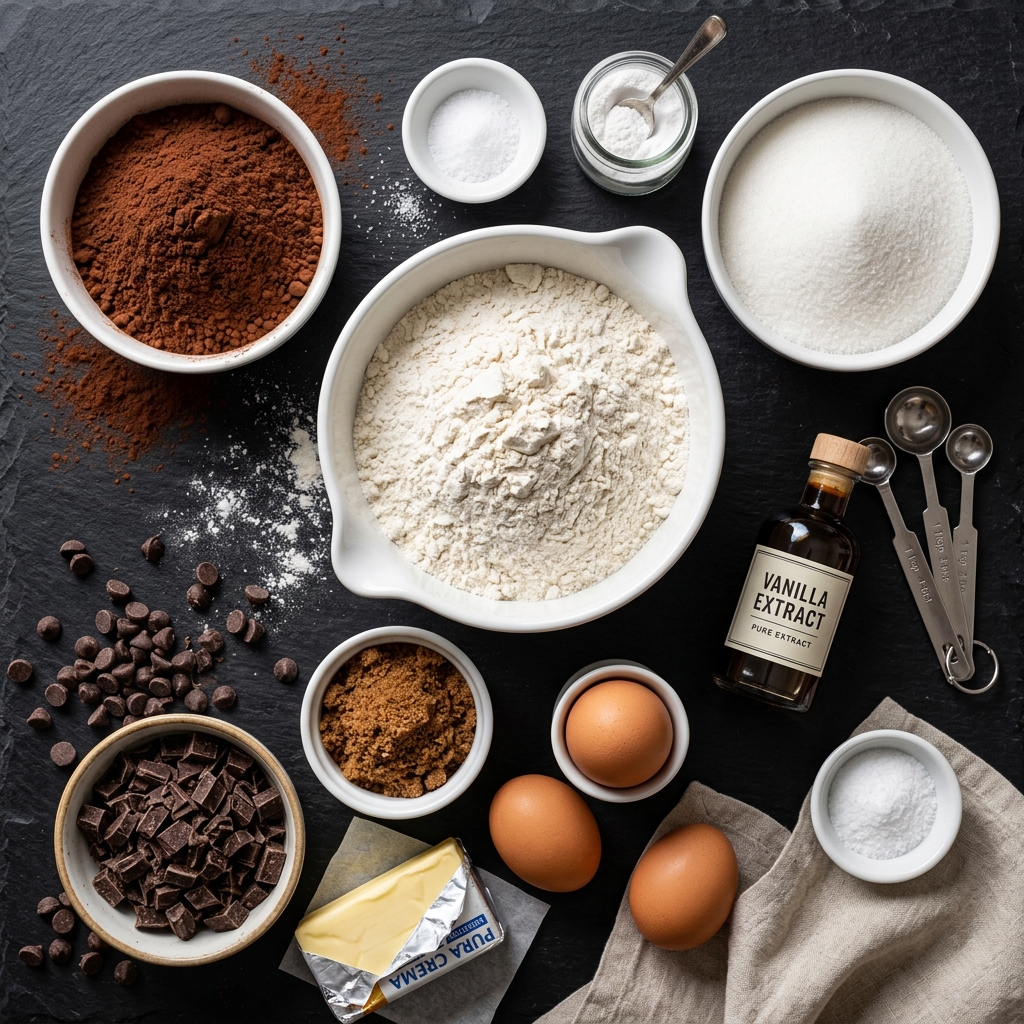
One of the reasons classic brownies remain such a beloved dessert is that they require only a handful of everyday pantry staples. Although the ingredient list is relatively short, each ingredient plays an important role in achieving the perfect balance of flavor, texture, and moisture.
Unsalted Butter (1 cup / 226g)
Butter is responsible for much of the brownie’s rich flavor and moist texture. Using unsalted butter allows you to control the amount of salt in the recipe more accurately. Melted butter also contributes to the dense, fudgy consistency that makes brownies so satisfying.
If possible, choose high-quality butter since its flavor will be noticeable in the finished dessert.
Granulated Sugar (2 cups / 400g)
Sugar does much more than sweeten brownies.
It helps create:
- The signature shiny, crackly top
- A tender crumb
- Moist texture
- Slightly chewy edges
Using the proper amount of sugar is essential for achieving authentic bakery-style brownies.
Brown Sugar (½ cup / 100g)
Although optional in some recipes, brown sugar adds depth of flavor and extra moisture thanks to its molasses content.
Benefits include:
- Softer texture
- Rich caramel notes
- Longer-lasting freshness
- Slightly chewier brownies
Large Eggs (4)
Eggs provide structure while keeping brownies rich and tender.
They also help create:
- Stable batter
- Glossy surface
- Better rise
- Smooth consistency
Room-temperature eggs blend more evenly into the batter than cold eggs.
Pure Vanilla Extract (2 teaspoons)
Vanilla enhances chocolate without overpowering it.
Rather than making brownies taste like vanilla, it deepens the overall flavor and gives them a more balanced sweetness.
All-Purpose Flour (1 cup / 125g)
Flour provides structure, but using too much can quickly turn brownies into cake.
Measure carefully using a kitchen scale whenever possible.
Avoid packing flour into measuring cups.
Unsweetened Cocoa Powder (¾ cup / 75g)
A good-quality cocoa powder delivers intense chocolate flavor.
Dutch-process cocoa creates darker brownies with a smoother flavor, while natural cocoa offers a slightly brighter chocolate taste.
Both work well, although many bakers prefer Dutch-process cocoa for richer brownies.
Dark Chocolate (170g / 6 ounces)
Melted dark chocolate dramatically improves flavor and texture.
Choose chocolate containing around 60–70% cocoa for the perfect balance between sweetness and richness.
Avoid chocolate-flavored candy bars, which often contain stabilizers that affect baking performance.
Chocolate Chips (1 cup)
Chocolate chips create pockets of melted chocolate throughout every brownie.
You can use:
- Semi-sweet chocolate chips
- Dark chocolate chips
- Milk chocolate chips
- Mini chocolate chips
Combining two varieties often creates an even better chocolate experience.
Salt (½ teaspoon)
Salt is one of the smallest ingredients but one of the most important.
It enhances chocolate flavor while balancing sweetness.
Fine sea salt works especially well.
Optional Espresso Powder (1 teaspoon)
Espresso powder does not make brownies taste like coffee.
Instead, it intensifies the natural chocolate flavor, making every bite richer and deeper.
This is one of the favorite tricks used by professional pastry chefs.
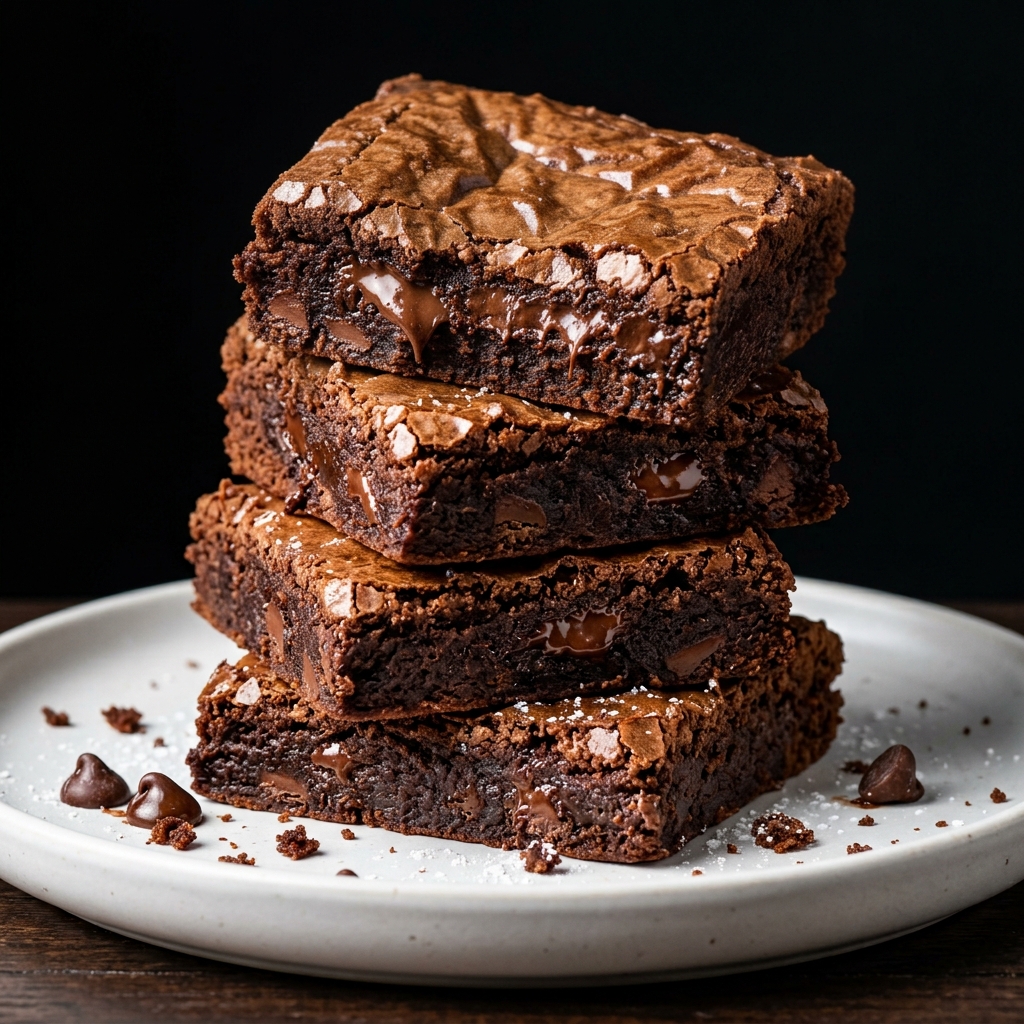
Step-by-Step Preparation Guide
Creating exceptional brownies isn’t difficult, but attention to detail makes all the difference. Follow each step carefully to achieve brownies with crackly tops, chewy edges, and perfectly fudgy centers.
Step 1: Prepare the Baking Pan
Begin by preheating your oven to 350°F (175°C).
Grease an 8×8-inch or 9×9-inch square baking pan with butter or non-stick spray.
Line the pan with parchment paper, leaving enough overhang to lift the brownies out after baking.
This simple step makes slicing much easier and prevents sticking.
Step 2: Melt the Butter and Chocolate
Place the butter and chopped dark chocolate into a heatproof bowl.
Melt them gently using either:
- A microwave in short intervals
- A double boiler over simmering water
Stir until completely smooth.
Allow the mixture to cool slightly before adding the eggs.
Adding eggs while the chocolate is too hot may partially cook them.
Step 3: Combine the Sugars
Whisk the granulated sugar and brown sugar into the warm chocolate mixture.
Continue whisking until smooth and glossy.
This process begins dissolving the sugar, which contributes to the beautiful crackly top during baking.
Step 4: Add the Eggs
Add the eggs one at a time.
Whisk thoroughly after each addition.
The batter should become thick, silky, and shiny.
Avoid rushing this step.
Many experienced bakers whisk the eggs for several minutes because incorporating enough air helps produce the signature glossy crust.
Step 5: Stir in Vanilla
Mix in the vanilla extract until fully incorporated.
The batter should now smell intensely chocolaty with subtle vanilla notes.
Step 6: Mix the Dry Ingredients
In a separate bowl, whisk together:
- Flour
- Cocoa powder
- Salt
- Espresso powder (if using)
Whisking prevents lumps while distributing the ingredients evenly.
Step 7: Fold Everything Together
Gradually fold the dry ingredients into the chocolate mixture using a spatula.
Mix only until no dry streaks remain.
Overmixing develops gluten, resulting in tougher brownies.
The batter should be thick but smooth.
Step 8: Fold in Chocolate Chips
Gently fold the chocolate chips into the batter.
Reserve a handful for sprinkling across the top before baking.
This creates an attractive appearance while adding extra bursts of melted chocolate.
Step 9: Transfer to the Pan
Spread the batter evenly into the prepared baking pan.
Use an offset spatula or the back of a spoon to smooth the surface.
Tap the pan lightly on the countertop to remove large air pockets.
Step 10: Bake Carefully
Bake for approximately 30–38 minutes, depending on your oven and desired texture.
The edges should appear set while the center still has a slight wobble.
A toothpick inserted near the center should come out with a few moist crumbs attached—not wet batter and not completely clean.
Remember that brownies continue cooking slightly after they leave the oven.
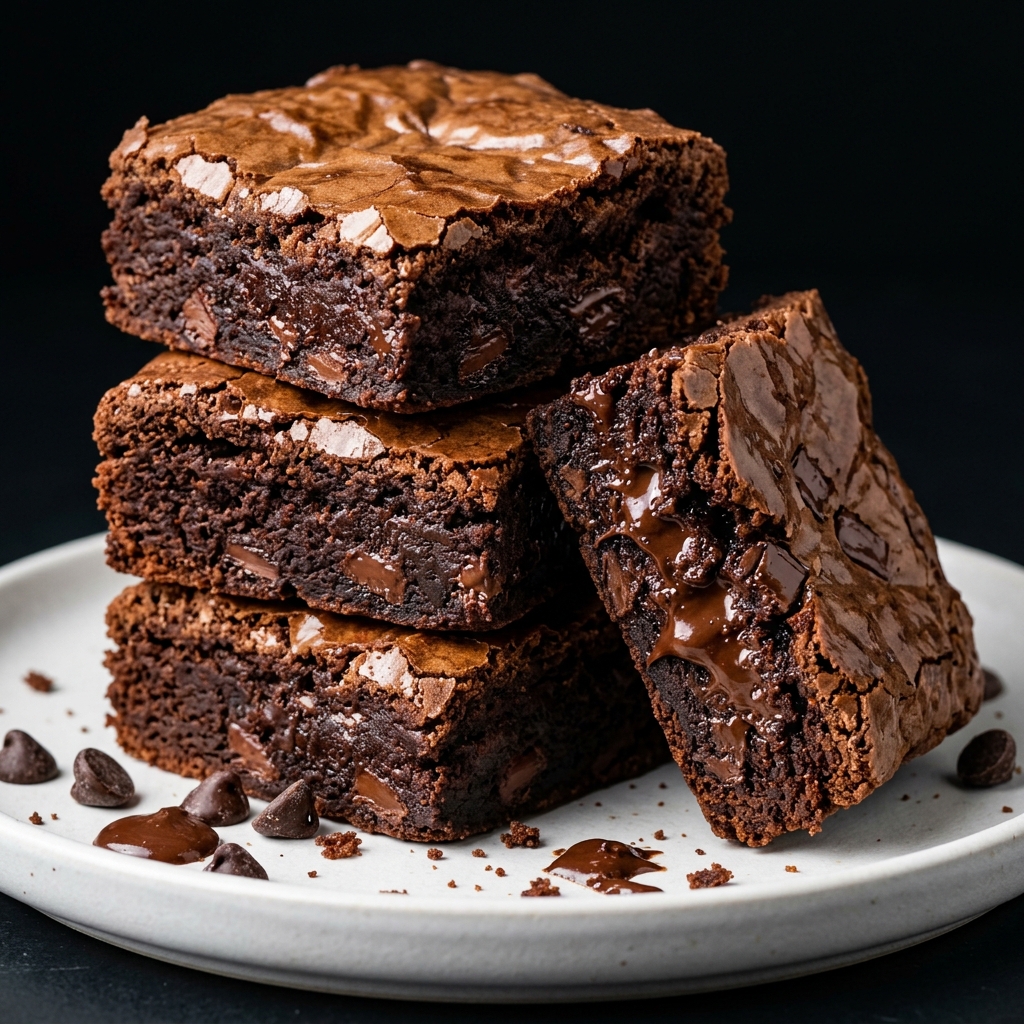
The Secret Behind Truly Exceptional Brownies
Many people assume brownies are one of the easiest desserts to bake, yet they’re surprisingly easy to get wrong. Overbaking by just a few minutes can transform a rich, fudgy dessert into something dry and crumbly. Likewise, using too much flour or aggressively mixing the batter can completely change the final texture. Understanding these small details is what separates homemade brownies from bakery-quality brownies. Once you learn the reasons behind each step, you’ll consistently achieve results that are rich, moist, and deeply chocolaty.
Another often-overlooked secret is patience. Fresh brownies smell incredible straight from the oven, making it tempting to slice into them immediately. However, allowing them to cool completely gives the chocolate and butter time to set properly, resulting in cleaner slices and an even fudgier texture. Many bakers even find that brownies taste better several hours after baking—or the next day—when the flavors have had time to fully develop. Sometimes, the hardest part of making perfect brownies is simply waiting before taking that first delicious bite.
Recipe Variations
One of the best things about classic brownies is how versatile they are. Once you’ve mastered the basic recipe, you can easily customize it to suit different tastes, occasions, or dietary preferences. Here are some delicious variations worth trying.
Double Chocolate Brownies
If you’re a true chocolate lover, double chocolate brownies are a must. Simply increase the amount of chocolate chips or chunks folded into the batter. As the brownies bake, the chocolate melts into rich pockets of gooey goodness, making every bite even more indulgent.
Walnut Brownies
Chopped walnuts add a pleasant crunch that contrasts beautifully with the soft, fudgy interior. Toast the walnuts for a few minutes before adding them to the batter to enhance their natural flavor. Pecans also make an excellent substitute if you prefer a slightly sweeter nut.
Salted Caramel Brownies
Swirl thick caramel sauce into the brownie batter before baking, then sprinkle a small pinch of flaky sea salt over the top. The combination of rich chocolate and buttery caramel creates an irresistible sweet-and-salty dessert.
Peanut Butter Swirl Brownies
Warm creamy peanut butter until it becomes easy to drizzle, then swirl it gently through the batter using a butter knife. The peanut butter creates beautiful marbled patterns while adding a rich, nutty flavor.
Cookies and Cream Brownies
Fold roughly chopped chocolate sandwich cookies into the batter and sprinkle additional pieces over the top before baking. This variation adds both texture and a delicious cookies-and-cream flavor that children and adults alike enjoy.
Espresso Brownies
For an even deeper chocolate flavor, increase the espresso powder slightly or add a tablespoon of cooled espresso. Coffee naturally enhances chocolate without overpowering it, creating a richer and more complex dessert.
Mint Chocolate Brownies
Add a small amount of peppermint extract to the batter and finish with chopped mint chocolate pieces. These brownies are especially popular during the holiday season.
Raspberry Brownies
Fresh or frozen raspberries add brightness that balances the richness of the chocolate. Gently fold them into the batter to avoid crushing them completely.
Gluten-Free Brownies
Replace the all-purpose flour with a high-quality gluten-free baking blend that includes xanthan gum. The brownies will remain rich and fudgy while being suitable for those avoiding gluten.
Extra Fudgy Brownies
For brownies with an even softer center, reduce the flour slightly and remove them from the oven just before the center is fully set. They’ll continue cooking as they cool, resulting in an incredibly moist texture.
Expert Tips for Perfect Classic Brownies
Professional bakers know that exceptional brownies aren’t about complicated techniques—they’re about paying attention to the details. These expert tips will help you achieve consistent, bakery-quality results every time.
Use High-Quality Chocolate
Since chocolate is the star ingredient, choosing good-quality chocolate makes a noticeable difference. Chocolate with around 60–70% cocoa content offers the perfect balance between sweetness and deep chocolate flavor.
Measure Ingredients Accurately
Brownies are less forgiving than many other baked goods. Too much flour can make them dry and cakey, while too little can leave them under-structured. Using a digital kitchen scale is the most reliable way to ensure accuracy.
Don’t Overmix the Batter
Once the dry ingredients are added, stir only until everything is combined. Excessive mixing develops gluten, which creates a tougher, more cake-like brownie instead of a tender, fudgy one.
Line the Pan with Parchment Paper
Parchment paper makes removing the brownies effortless and helps keep the edges intact. The overhanging sides also act as handles, allowing you to lift the entire slab from the pan before slicing.
Watch the Baking Time Closely
Every oven behaves differently. Begin checking your brownies a few minutes before the suggested baking time. It’s better to remove them slightly early than leave them in too long.
Let Them Cool Completely
Although it may be tempting to dig in immediately, patience pays off. Cooling allows the brownies to firm up, making them easier to cut while also improving their texture and flavor.
Use a Warm Knife for Clean Slices
For neat, professional-looking brownie squares, dip a sharp knife in hot water, wipe it dry, then slice. Clean the knife between each cut for perfectly defined edges.
Don’t Skip the Salt
A small amount of salt doesn’t just season the brownies—it enhances the chocolate flavor and balances the sweetness, creating a more satisfying dessert.
Add Chocolate Chips on Top
Sprinkling a few extra chocolate chips over the batter before baking gives the finished brownies an attractive bakery-style appearance and extra bursts of melted chocolate.
Make Ahead Options
Classic brownies are an excellent make-ahead dessert because their flavor often improves after resting for several hours.
You can prepare the batter up to one day in advance and store it tightly covered in the refrigerator. Before baking, allow the batter to sit at room temperature for about 20 to 30 minutes so it spreads more easily in the pan.
Fully baked brownies also store exceptionally well. Once cooled completely, wrap them tightly in plastic wrap or place them in an airtight container. They’re ideal for meal prep, lunchboxes, bake sales, parties, and holiday dessert trays.
If you want to prepare brownies well in advance, they freeze beautifully. Individually wrap each brownie before placing them in a freezer-safe container or zip-top bag. This makes it easy to thaw only as many servings as needed.
What to Serve with Classic Brownies
Although brownies are delicious on their own, pairing them with complementary flavors can turn a simple dessert into something truly memorable.
Some of the best accompaniments include:
- Vanilla ice cream
- Chocolate ice cream
- Salted caramel ice cream
- Fresh strawberries
- Fresh raspberries
- Whipped cream
- Chocolate ganache
- Hot fudge sauce
- Salted caramel sauce
- Warm espresso
- Freshly brewed coffee
- Cappuccino
- Cold milk
- Hot chocolate
- Chopped toasted pecans
- Roasted walnuts
- Fresh mint leaves for garnish
For special occasions, serve warm brownies with a scoop of vanilla ice cream and a drizzle of hot chocolate or caramel sauce for a restaurant-quality dessert.
How to Store Classic Brownies
Proper storage helps maintain the brownies’ rich texture and fresh flavor.
At Room Temperature
Store completely cooled brownies in an airtight container for up to four days. Place a sheet of parchment paper between layers to prevent sticking.
In the Refrigerator
Brownies can be refrigerated for up to one week. Allow them to come to room temperature before serving, or warm them slightly in the microwave for a softer texture.
In the Freezer
Freeze individually wrapped brownies in an airtight freezer-safe bag or container for up to three months. Thaw overnight in the refrigerator or at room temperature before serving.
Reheating
Warm a brownie in the microwave for 10 to 15 seconds to recreate that fresh-from-the-oven softness. Pair it with ice cream or whipped cream for an extra indulgent dessert.
Frequently Asked Questions
Why didn’t my brownies develop a shiny, crackly top?
A shiny top usually forms when the sugar dissolves properly and the eggs are whisked thoroughly into the batter. Using the correct amount of sugar and avoiding overmixing after adding the flour also helps create this signature finish.
Why are my brownies dry?
Dry brownies are most often the result of overbaking or adding too much flour. Always measure carefully and remove the brownies from the oven when a toothpick comes out with a few moist crumbs rather than completely clean.
Can I use milk chocolate instead of dark chocolate?
Yes. Milk chocolate will produce sweeter brownies with a milder chocolate flavor. If using milk chocolate, you may want to slightly reduce the sugar to maintain a balanced taste.
Should brownies be refrigerated?
Not necessarily. Brownies stay fresh at room temperature for several days when stored in an airtight container. Refrigeration is useful if you need to keep them longer, though it can make them firmer until they return to room temperature.
Can I freeze brownies?
Absolutely. Brownies freeze exceptionally well for up to three months. Wrap each piece individually to preserve freshness and make thawing convenient.
How do I know when brownies are fully baked?
The edges should be set while the center remains slightly soft. A toothpick inserted near the center should come out with moist crumbs attached rather than wet batter. Remember that brownies continue cooking as they cool.
Can I add mix-ins to the batter?
Yes. Chocolate chips, chopped nuts, crushed cookies, caramel, peanut butter swirls, marshmallows, or dried fruit can all be added without significantly changing the recipe. Avoid adding too many mix-ins, as they can affect the brownies’ structure.
Conclusion
Classic brownies have earned their place as one of the world’s most beloved desserts for good reason. They’re simple enough for beginner bakers, yet endlessly rewarding for experienced ones who enjoy perfecting every detail. From the glossy, crackly top to the dense, fudgy center, every bite offers a rich chocolate experience that’s difficult to resist.
With the techniques, tips, and variations shared throughout this guide, you’re well equipped to bake brownies that look as impressive as they taste. Whether you’re preparing them for a celebration, sharing them with friends and family, or simply treating yourself after a long day, these classic brownies are sure to become a recipe you’ll return to again and again. Once you’ve mastered the basics, don’t hesitate to experiment with flavors and toppings to make each batch uniquely your own. Happy baking!
Classic Brownies
Ingredients
Equipment
Method
- Preheat the oven to 350°F (175°C). Grease and line an 8×8-inch or 9×9-inch baking pan with parchment paper.
- Melt the butter and chopped dark chocolate together using a microwave or double boiler. Stir until smooth and allow to cool slightly.
- Whisk the granulated sugar and brown sugar into the melted chocolate mixture until glossy.
- Add the eggs one at a time, whisking well after each addition until the batter becomes thick and smooth.
- Stir in the vanilla extract.
- In a separate bowl, whisk together the flour, cocoa powder, salt, and espresso powder (if using).
- Gently fold the dry ingredients into the chocolate mixture until just combined. Do not overmix.
- Fold in the chocolate chips, reserving a small handful to sprinkle on top.
- Pour the batter into the prepared baking pan and spread evenly.
- Sprinkle the reserved chocolate chips over the surface.
- Bake for 30–35 minutes, or until the edges are set and a toothpick inserted near the center comes out with a few moist crumbs.
- Remove from the oven and allow the brownies to cool completely in the pan.
- For the best texture and clean slices, chill for about 1 hour before cutting into squares.
Notes
Room-temperature eggs mix more easily and help create the signature shiny, crackly top.
Do not overmix after adding the flour, as this can make the brownies tough instead of fudgy.
Slightly underbaking the brownies results in a softer, richer center.
Let the brownies cool completely before slicing for the cleanest cuts.
Store leftovers in an airtight container at room temperature for up to 4 days, refrigerate for up to 1 week, or freeze for up to 3 months.
For extra indulgence, serve warm with vanilla ice cream, whipped cream, or a drizzle of hot fudge or salted caramel sauce.