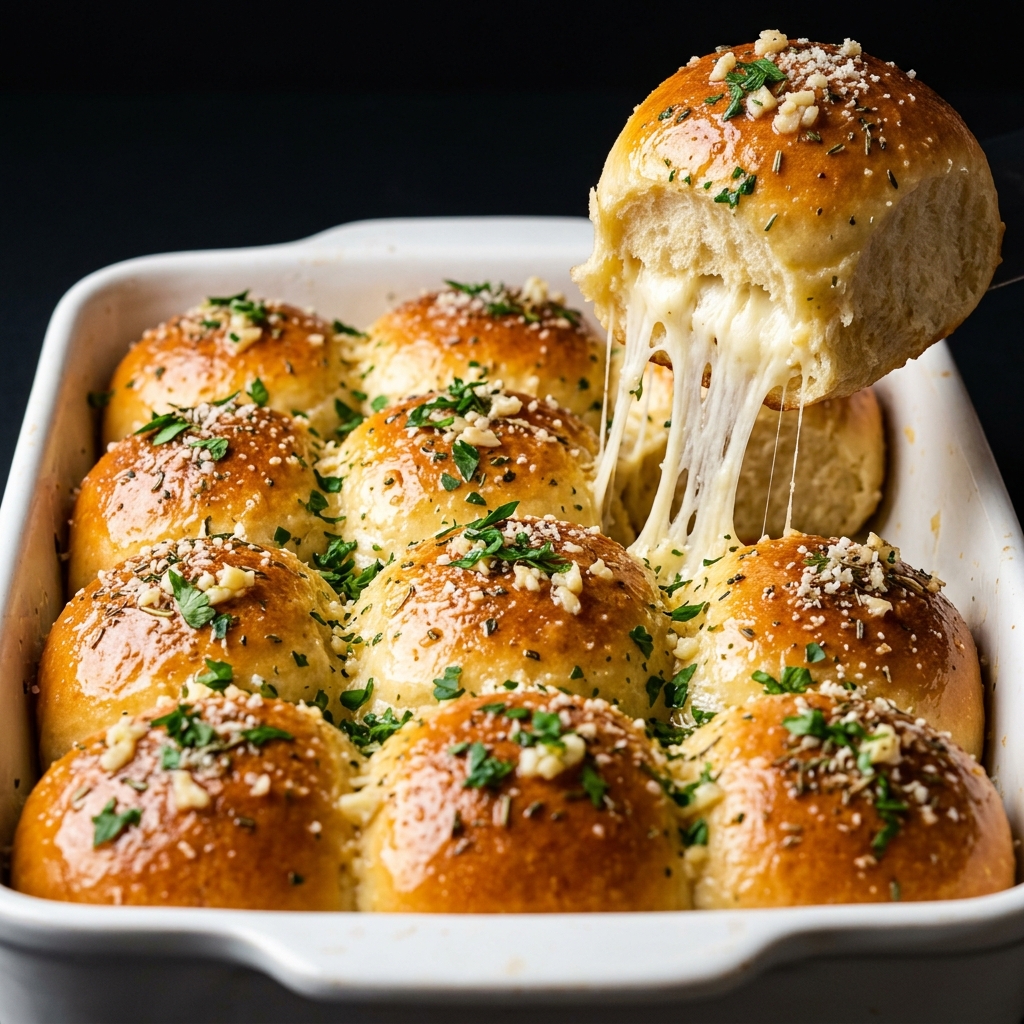

There is something incredibly comforting about a pan of freshly baked Chicken Enchiladas bubbling with rich sauce and melted cheese. Filled with tender, flavorful chicken and wrapped in soft tortillas, this classic Mexican-inspired dish delivers bold flavor in every bite and makes an unforgettable meal for family dinners, special gatherings, or an easy comfort-food night at home.
Ingredients for Chicken Enchiladas

One of the best things about making Chicken Enchiladas at home is that the ingredients are simple, flexible, and easy to customize. Each ingredient plays an important role in building the rich, comforting flavors that make this dish so popular.
For the best results, use fresh ingredients whenever possible and choose good-quality enchilada sauce, cheese, and tortillas.
For the Chicken Filling
- 2 large boneless, skinless chicken breasts, cooked and shredded
- 1 tablespoon olive oil
- 1 small onion, finely chopped
- 2 cloves garlic, minced
- 1 teaspoon ground cumin
- 1 teaspoon chili powder
- ½ teaspoon smoked paprika
- Salt, to taste
- Freshly ground black pepper, to taste
- ½ cup enchilada sauce
- ½ cup canned black beans, drained and rinsed, optional
- ½ cup corn kernels, optional
For Assembling the Enchiladas
- 8 medium flour or corn tortillas
- 2 cups red enchilada sauce
- 2 cups shredded cheese, such as cheddar, Monterey Jack, or a Mexican cheese blend
- 1 tablespoon olive oil or cooking spray for preparing the baking dish
Optional Toppings
- Fresh cilantro, chopped
- Sliced avocado
- Sour cream
- Sliced jalapeños
- Diced tomatoes
- Thinly sliced red onion
- Lime wedges
Choosing the Best Chicken
The chicken is the heart of this recipe, so it is important to use chicken that stays tender and juicy after baking. Boneless, skinless chicken breasts are a popular choice because they are lean and easy to shred, but chicken thighs can also be used if you prefer richer, juicier meat.
You can cook the chicken specifically for this recipe by poaching, baking, grilling, or pan-searing it. However, leftover roasted chicken or rotisserie chicken can save time and make this recipe especially convenient for busy weeknights.
The most important step is shredding the chicken into bite-sized pieces. Avoid leaving large chunks, as smaller pieces absorb the seasonings and enchilada sauce more evenly.
Flour Tortillas or Corn Tortillas?
Both flour and corn tortillas can be used for Chicken Enchiladas, but they create slightly different results.
Flour tortillas are soft, flexible, and easy to roll without breaking. They create a mild flavor and are often preferred by people who enjoy a softer, comforting texture.
Corn tortillas provide a more traditional flavor and add a slightly earthy taste that pairs beautifully with the rich enchilada sauce. However, they can crack when rolled if they are cold or dry. Lightly warming corn tortillas before filling them makes them softer and much easier to work with.
If you want a gluten-free version, use certified gluten-free corn tortillas and carefully check the labels on your enchilada sauce and seasonings.
Why the Cheese Matters
Cheese is one of the ingredients that transforms a simple tray of filled tortillas into a rich and irresistible baked dish. A combination of cheeses often produces the best flavor and texture.
Monterey Jack melts beautifully and creates a creamy, smooth topping, while cheddar adds a stronger, richer flavor. A Mexican cheese blend can also be a convenient choice because it usually contains cheeses selected specifically for melting.
For the most beautiful presentation, reserve some cheese for the top of the enchiladas. As the dish bakes, the cheese melts into the sauce and creates that golden, bubbling finish everyone loves.
How to Make Chicken Enchiladas Step by Step
Making Chicken Enchiladas may look impressive, but the process is actually straightforward. The recipe can be divided into three simple stages: preparing the flavorful chicken filling, rolling the tortillas, and baking everything together until hot and bubbly.
Taking a little extra care with each stage will give you enchiladas that are flavorful, tender, and beautifully saucy without becoming soggy.
Step 1: Prepare the Chicken
If your chicken has not already been cooked, start by cooking it using your preferred method.
For simple and tender shredded chicken, place the chicken breasts in a saucepan and cover them with water or chicken broth. Add a small amount of salt, bring the liquid to a gentle simmer, and cook until the chicken is fully cooked through.
Remove the chicken from the pan and allow it to cool slightly before shredding it with two forks.
If you are using leftover roasted chicken or rotisserie chicken, simply shred the meat and remove any skin or bones.
The goal is to have approximately 2½ to 3 cups of shredded chicken for the filling.
Step 2: Cook the Aromatics
Heat the olive oil in a large skillet over medium heat.
Add the finely chopped onion and cook for several minutes until it becomes soft and translucent. Stir occasionally to prevent it from browning too quickly.
Once the onion has softened, add the minced garlic. Cook for about 30 seconds, just until fragrant.
Garlic cooks quickly, so avoid leaving it unattended. Burnt garlic can create a bitter flavor that may affect the entire filling.
Step 3: Season the Filling
Add the shredded chicken to the skillet with the cooked onion and garlic.
Sprinkle in the ground cumin, chili powder, smoked paprika, salt, and black pepper.
Stir everything together until the chicken is evenly coated with the seasonings.
This is an important step because seasoning the chicken before adding the enchilada sauce creates layers of flavor. Instead of relying only on the sauce for taste, the filling itself becomes rich, savory, and delicious.
If you enjoy additional texture and flavor, this is also the perfect time to add black beans or corn.
Step 4: Add Enchilada Sauce
Pour approximately ½ cup of enchilada sauce over the seasoned chicken mixture.
Stir gently until the chicken is lightly coated. Allow the mixture to cook for another 2 to 3 minutes over low heat.
You do not want the filling to become overly wet. The purpose of this small amount of sauce is to add moisture and flavor while still allowing the tortillas to hold their shape during baking.
Remove the skillet from the heat and allow the filling to cool slightly while you prepare the tortillas and baking dish.
Step 5: Prepare the Baking Dish
Preheat your oven to 375°F (190°C).
Lightly grease a medium or large baking dish with olive oil or cooking spray.
Spread a thin layer of enchilada sauce across the bottom of the dish.
This simple step is extremely helpful because it prevents the tortillas from sticking and adds flavor to the bottom of the enchiladas as they bake.
You only need enough sauce to lightly cover the base of the baking dish. Using too much sauce underneath can cause the tortillas to become overly soft.
Step 6: Warm the Tortillas
Before filling and rolling the tortillas, warm them slightly.
Flour tortillas can be warmed briefly in a dry skillet or microwave.
Corn tortillas benefit even more from warming because they are more likely to crack when cold. You can warm them individually in a dry skillet for a few seconds on each side until they become flexible.
Do not overheat the tortillas. They only need to be warm enough to bend easily.
Step 7: Fill the Tortillas
Place one warmed tortilla on a clean plate or work surface.
Add a generous spoonful of the chicken filling down the center. Avoid overfilling because the tortilla needs enough room to roll securely.
A good rule is to fill the tortilla enough to create a satisfying enchilada while still leaving space around the edges.
Sprinkle a small amount of shredded cheese over the chicken filling if desired. This creates an extra creamy and cheesy center.
Step 8: Roll and Arrange
Roll the tortilla tightly around the filling and place it seam-side down into the prepared baking dish.
Repeat the process with the remaining tortillas and arrange them closely together in the dish.
Keeping the enchiladas close together helps them hold their shape while baking.
Once all the enchiladas are arranged, you are ready for the step that brings the entire dish together: the sauce and cheese.
Step 9: Add the Sauce
Pour the remaining enchilada sauce evenly over the rolled tortillas.
Try to cover the enchiladas generously while still allowing a little of the tortilla texture to remain visible around the edges.
The amount of sauce you use can be adjusted according to personal preference. If you love extra-saucy enchiladas, you can add a little more sauce. If you prefer a slightly firmer texture, use just enough sauce to coat the enchiladas without completely soaking them.
The key is balance.
A good Chicken Enchilada should be moist and flavorful but should still have enough structure to hold together when served.
Step 10: Add the Cheese
Sprinkle the shredded cheese evenly across the top of the enchiladas.
Make sure the cheese covers most of the surface so that every serving receives plenty of that delicious melted topping.
For an especially attractive finish, you can combine two types of cheese. Monterey Jack creates a smooth, creamy melt, while cheddar adds a deeper flavor and richer color.
At this stage, the enchiladas are ready to go into the oven.
The Secret to Restaurant-Quality Chicken Enchiladas
Here is where many home cooks discover the difference between ordinary enchiladas and truly unforgettable ones: the recipe is not only about putting chicken inside tortillas and covering them with sauce.
The real magic comes from building flavor in layers.
The chicken should be seasoned before it is wrapped inside the tortilla. The tortillas should be soft and flexible before rolling. The sauce should complement the filling rather than overpower it. Finally, the cheese should melt into the sauce and create a rich topping that brings every ingredient together.
But there is another detail that makes a surprisingly big difference.
The timing of the baking process determines whether your enchiladas stay beautifully structured or become too soft. This is why understanding how long to bake them, when to cover the dish, and when to add certain toppings can completely transform the final result.
And just when you think the classic version cannot get any better, there are countless ways to customize the filling, sauce, cheese, and toppings to create a version that perfectly matches your family’s taste.
Baking the Chicken Enchiladas to Perfection
Once the enchiladas are assembled, covered with sauce, and topped with cheese, place the baking dish in the preheated oven at 375°F (190°C).
Bake the enchiladas for approximately 20 to 25 minutes, or until the sauce is bubbling around the edges and the cheese has completely melted.
For the best texture, avoid overbaking. Leaving the enchiladas in the oven for too long can cause the tortillas to absorb too much sauce and become overly soft. The goal is to heat everything through while allowing the enchiladas to maintain their shape.
If you prefer a slightly golden and bubbly cheese topping, you can place the dish under the broiler for 1 to 2 minutes at the end of the baking time. Watch the enchiladas carefully during this step because cheese can brown very quickly.
Once baked, remove the dish from the oven and allow it to rest for approximately 5 minutes before serving.
This short resting period allows the sauce to settle and makes the enchiladas easier to serve.
Delicious Variations of Chicken Enchiladas
One reason Chicken Enchiladas remain a favorite in so many kitchens is their versatility. The classic recipe is delicious on its own, but you can easily adjust the ingredients to create an entirely different flavor experience.
Creamy White Chicken Enchiladas
Instead of using red enchilada sauce, prepare the enchiladas with a creamy white sauce.
A combination of sour cream, cream cheese, chicken broth, and melted cheese can create a rich and comforting sauce. This variation is especially popular with people who prefer a mild, creamy flavor over the smoky and slightly spicy taste of red enchilada sauce.
Green enchilada sauce also pairs beautifully with creamy ingredients and shredded chicken.
Green Chicken Enchiladas
Green enchiladas are made with salsa verde or green enchilada sauce.
The flavor is often bright, tangy, and slightly spicy, especially when tomatillos, green chilies, jalapeños, and fresh cilantro are involved.
This variation works particularly well with Monterey Jack cheese and toppings such as avocado, sour cream, and fresh lime juice.
Spicy Chicken Enchiladas
If you enjoy bold heat, there are several ways to make your enchiladas spicier.
Add diced jalapeños, serrano peppers, chipotle peppers, or extra chili powder to the chicken filling. You can also use a hot enchilada sauce.
However, add spicy ingredients gradually. It is much easier to increase the heat than to fix a filling that has become too spicy.
Chicken and Black Bean Enchiladas
Black beans add extra texture and make the filling more substantial.
Simply stir drained and rinsed black beans into the seasoned chicken mixture before filling the tortillas.
This variation is especially useful when you want to stretch the recipe and create more servings without adding additional chicken.
Chicken and Corn Enchiladas
Sweet corn creates a delicious contrast against the savory chicken, cheese, and enchilada sauce.
You can use fresh, frozen, or canned corn. Make sure frozen corn is thawed and canned corn is drained before adding it to the filling.
For even more flavor, lightly sauté the corn before mixing it with the chicken.
Cheesy Chicken Enchiladas
For serious cheese lovers, add cheese both inside and outside the enchiladas.
Use a mixture of Monterey Jack, cheddar, and Mexican cheese blend for different flavors and textures.
Remember that cheese should complement the chicken and sauce rather than completely overpower them. A balanced filling and generous but controlled cheese topping usually create the best result.
Expert Tips for the Best Chicken Enchiladas
Making enchiladas is simple, but a few professional techniques can take the recipe from good to exceptional.
Do Not Overfill the Tortillas
It can be tempting to add as much chicken filling as possible, but overfilled tortillas are difficult to roll and may open while baking.
Use enough filling to create a satisfying enchilada while allowing the tortilla to close securely.
A neatly rolled enchilada also creates a better presentation when served.
Season Every Layer
One of the biggest secrets to flavorful cooking is avoiding the mistake of seasoning only the final sauce.
The chicken filling should be flavorful on its own. The enchilada sauce should add another layer of flavor, and the toppings should provide freshness and contrast.
When every component is properly seasoned, the finished dish tastes balanced and complete.
Warm Your Tortillas Before Rolling
Cold tortillas are more likely to crack or tear.
Warming them for a few seconds makes them soft and flexible, allowing you to roll them neatly around the chicken filling.
This step is particularly important when using corn tortillas.
Avoid Using Too Much Sauce
Chicken Enchiladas should be saucy, but excessive sauce can quickly make them soggy.
Start with the recommended amount and add more only if needed.
A properly made enchilada should be tender and moist while still holding its shape when placed on a plate.
Shred Your Own Cheese When Possible
Pre-shredded cheese is convenient, but freshly shredded cheese often melts more smoothly.
Packaged shredded cheese may contain ingredients designed to prevent the cheese from clumping together, which can sometimes affect how smoothly it melts.
If you have a few extra minutes, shredding your own cheese can create a creamier and more attractive topping.
Let the Enchiladas Rest Before Serving
Freshly baked enchiladas may look ready to eat immediately, but allowing them to rest for a few minutes is worth the wait.
The sauce settles, the cheese firms slightly, and the enchiladas become easier to remove from the baking dish.
This simple step can make a noticeable difference in both presentation and texture.
Make Ahead Options
Chicken Enchiladas are an excellent make-ahead meal, making them perfect for busy weeknights, meal planning, family gatherings, and special occasions.
Prepare the Filling in Advance
The chicken filling can be prepared up to 2 days in advance.
Allow it to cool completely, then store it in an airtight container in the refrigerator.
When you are ready to make the enchiladas, simply warm the filling slightly if necessary and assemble the recipe as usual.
Assemble the Enchiladas Ahead of Time
You can also assemble the entire dish ahead of time.
Prepare and roll the enchiladas, arrange them in the baking dish, and cover them tightly. Store them in the refrigerator until you are ready to bake.
For the best texture, consider waiting to add some or all of the enchilada sauce until shortly before baking. This can help prevent the tortillas from absorbing too much moisture while sitting in the refrigerator.
When ready to cook, add the sauce and cheese and bake until hot and bubbly.
Freeze for Later
Chicken Enchiladas can also be frozen for a convenient future meal.
For best results, assemble the enchiladas in a freezer-safe baking dish and allow the filling to cool completely before freezing.
Cover the dish tightly to protect it from freezer burn.
When you are ready to enjoy the enchiladas, thaw them in the refrigerator overnight and bake according to the recipe instructions.
If baking directly from frozen, additional baking time will be needed. Covering the dish during the first part of baking can help prevent the cheese from becoming too dark before the center is completely heated.
What to Serve with Chicken Enchiladas
Chicken Enchiladas are filling enough to enjoy on their own, but the right side dishes can turn them into an unforgettable Mexican-inspired meal.
Here are some delicious options to serve alongside them.
Mexican Rice
Mexican rice is one of the most popular side dishes for enchiladas.
Its savory tomato-based flavor pairs perfectly with rich enchilada sauce and cheesy chicken filling.
The rice also helps create a more complete and satisfying meal.
Refried Beans
Creamy refried beans are another classic choice.
They add a smooth and comforting texture that balances the saucy enchiladas.
You can top the beans with a little cheese, fresh cilantro, or diced onions for extra flavor.
Black Beans
Seasoned black beans are a lighter alternative to refried beans.
They are easy to prepare and can be flavored with garlic, cumin, lime juice, and cilantro.
Fresh Mexican Salad
A crisp salad provides a refreshing contrast to the rich and cheesy enchiladas.
Try combining lettuce, tomatoes, avocado, red onion, corn, and a bright lime dressing.
The freshness of the vegetables helps balance the heavier flavors of the baked dish.
Guacamole
Creamy homemade guacamole is always a welcome addition.
Serve it on the side with tortilla chips or spoon it directly onto the enchiladas.
The rich avocado and fresh lime flavor complement the spicy and savory ingredients beautifully.
Salsa and Chips
A bowl of fresh salsa served with crispy tortilla chips is perfect for starting the meal.
Choose tomato salsa, salsa verde, corn salsa, or a spicy homemade version depending on your preferred flavors.
Corn on the Cob or Mexican Street Corn
Sweet corn is another excellent pairing for Chicken Enchiladas.
Mexican-style street corn, often prepared with creamy toppings, cheese, lime, and seasonings, creates a flavorful side dish that complements the Mexican-inspired meal beautifully.
How to Store Chicken Enchiladas
Proper storage is important for maintaining the flavor and texture of leftover Chicken Enchiladas.
Storing in the Refrigerator
Allow leftover enchiladas to cool before transferring them to an airtight container.
Store them in the refrigerator and enjoy them within 3 to 4 days.
If possible, keep the enchiladas covered with some of their sauce. This helps prevent the tortillas and chicken from drying out.
Reheating Chicken Enchiladas
Chicken Enchiladas can be reheated in the oven or microwave.
For the oven, place the enchiladas in a baking dish and cover loosely with foil. Heat at approximately 350°F (175°C) until warmed through.
If the enchiladas look dry, add a small amount of enchilada sauce before reheating.
For a faster option, reheat individual servings in the microwave until hot.
The oven generally provides the best texture, while the microwave is ideal when you need a quick meal.
Freezing Leftovers
Leftover enchiladas can also be frozen.
Place them in a freezer-safe container and seal tightly.
For the best flavor and texture, enjoy frozen leftovers within approximately 2 to 3 months.
Thaw overnight in the refrigerator before reheating whenever possible.
Frequently Asked Questions About Chicken Enchiladas
Can I Use Rotisserie Chicken for Chicken Enchiladas?
Yes, rotisserie chicken is an excellent option for Chicken Enchiladas.
It saves preparation time and already has plenty of flavor. Simply remove the skin and bones, shred the chicken, and mix it with the seasonings and enchilada sauce.
This is one of the easiest ways to prepare Chicken Enchiladas quickly on a busy day.
Should I Use Flour or Corn Tortillas?
Both can be used successfully.
Flour tortillas are softer and easier to roll, while corn tortillas provide a more traditional flavor.
If using corn tortillas, warm them before filling to help prevent cracking.
Your choice ultimately depends on the flavor and texture you prefer.
Why Are My Chicken Enchiladas Soggy?
Soggy enchiladas are usually caused by using too much sauce, allowing the tortillas to sit in the sauce for too long before baking, or overbaking the dish.
To avoid this problem, use a balanced amount of sauce and bake the enchiladas only until heated through and bubbly.
If preparing the dish ahead of time, consider adding the sauce closer to baking time.
Can I Make Chicken Enchiladas Without Cheese?
Yes, you can make Chicken Enchiladas without cheese.
The chicken filling and enchilada sauce can still provide plenty of flavor.
You can also use dairy-free cheese alternatives if you prefer a dairy-free version.
Keep in mind that the overall texture and flavor will be different from traditional cheesy enchiladas.
Can I Make Chicken Enchiladas Gluten-Free?
Yes, Chicken Enchiladas can be made gluten-free.
Use certified gluten-free corn tortillas and carefully check the labels of the enchilada sauce, spices, and any other packaged ingredients.
Some sauces and seasonings may contain ingredients that are not suitable for a gluten-free diet, so checking labels is important.
How Do I Keep Corn Tortillas From Breaking?
The easiest solution is to warm the tortillas before rolling them.
Heat each tortilla briefly in a dry skillet or microwave until soft and flexible.
Avoid overheating them because they can become dry and difficult to handle.
Can I Add Vegetables to the Chicken Filling?
Absolutely.
Vegetables such as corn, black beans, bell peppers, onions, spinach, and zucchini can all be added to the chicken filling.
Sauté vegetables with a high moisture content before adding them to the filling so they do not release too much water while the enchiladas bake.
Can I Freeze Chicken Enchiladas Before Baking?
Yes, Chicken Enchiladas freeze very well before baking.
Prepare and assemble the enchiladas in a freezer-safe dish, allow the filling to cool completely, and cover tightly.
For the best texture, freeze the dish before baking and thaw it in the refrigerator before cooking.
Conclusion
Chicken Enchiladas are the kind of recipe that brings comfort, color, and bold flavor to the dinner table. With tender shredded chicken, soft tortillas, rich enchilada sauce, and a generous layer of melted cheese, every bite delivers the satisfying combination that makes this dish a favorite for so many families.
The beauty of this recipe is that it can be as simple or as creative as you want it to be. Stick with the classic version for an easy and comforting dinner, experiment with green sauce or creamy white sauce, add beans and vegetables, or adjust the spice level to create a recipe that perfectly suits your taste.
Once you understand the key techniques—seasoning the filling well, warming the tortillas, using the right amount of sauce, and avoiding overbaking—you can confidently make delicious Chicken Enchiladas whenever the craving strikes.
Whether you are preparing them for a busy weeknight dinner, a family gathering, meal prep, or a Mexican-inspired feast, these cheesy and flavorful Chicken Enchiladas are always a delicious reason to gather around the table and enjoy a comforting homemade meal.

Chicken Enchiladas Recipe
Ingredients
Equipment
Method
- Cook the chicken breasts using your preferred method, such as poaching, baking, grilling, or pan-searing. Once fully cooked, allow the chicken to cool slightly and shred it using two forks. You can also use cooked leftover chicken or rotisserie chicken to save time.
- Heat the olive oil in a large skillet over medium heat. Add the chopped onion and cook until soft and translucent, stirring occasionally. Add the minced garlic and cook for about 30 seconds until fragrant.
- Add the shredded chicken to the skillet. Stir in the ground cumin, chili powder, smoked paprika, salt, and black pepper.
- If using black beans or corn, add them at this stage and mix well.
- Pour ½ cup of red enchilada sauce over the chicken mixture. Stir until everything is lightly coated and cook for 2 to 3 minutes over low heat.
- Remove the skillet from the heat and allow the filling to cool slightly.
- Preheat the oven to 375°F (190°C).
- Lightly grease a baking dish with olive oil or cooking spray. Spread a thin layer of enchilada sauce across the bottom of the dish.
- Warm the tortillas briefly in a dry skillet or microwave until soft and flexible.
- If using corn tortillas, warming them is especially important because it helps prevent cracking while rolling.
- Place a tortilla on a clean work surface. Add a generous spoonful of the chicken filling to the center and sprinkle with a little shredded cheese, if desired.
- Roll the tortilla tightly around the filling and place it seam-side down in the prepared baking dish.
- Repeat with the remaining tortillas and filling.
- Pour the remaining enchilada sauce evenly over the rolled tortillas. Make sure they are well coated without adding so much sauce that they become overly soggy.
- Sprinkle the shredded cheese evenly over the top of the enchiladas.
- For extra flavor, use a combination of cheddar and Monterey Jack cheese.
- Place the baking dish in the preheated oven and bake for 20 to 25 minutes, or until the sauce is bubbling and the cheese has completely melted.
- For a lightly golden cheese topping, broil the enchiladas for 1 to 2 minutes at the end of baking. Watch carefully to prevent burning.
- Remove the Chicken Enchiladas from the oven and allow them to rest for about 5 minutes before serving.
- Garnish with fresh cilantro, avocado, sour cream, jalapeños, tomatoes, red onion, or lime wedges as desired.
- Serve warm and enjoy.
Notes
Warm the tortillas before rolling to prevent them from cracking.
Avoid adding too much enchilada sauce, as this can make the tortillas overly soft.
Freshly shredded cheese generally melts more smoothly than pre-shredded cheese.
Corn tortillas can be used for a more traditional flavor, while flour tortillas provide a softer texture.
For a gluten-free version, use certified gluten-free corn tortillas and check all packaged ingredients carefully.
The chicken filling can be prepared up to 2 days in advance and stored in the refrigerator.
Leftover Chicken Enchiladas can be stored in an airtight container in the refrigerator for 3 to 4 days.
Serve with Mexican rice, refried beans, black beans, guacamole, salsa, or a fresh Mexican-style salad for a complete meal.

Hi, I’m Clara, the creator of Barakala. I love sharing simple, comforting, and delicious recipes that make everyday cooking easier and more enjoyable for home cooks.