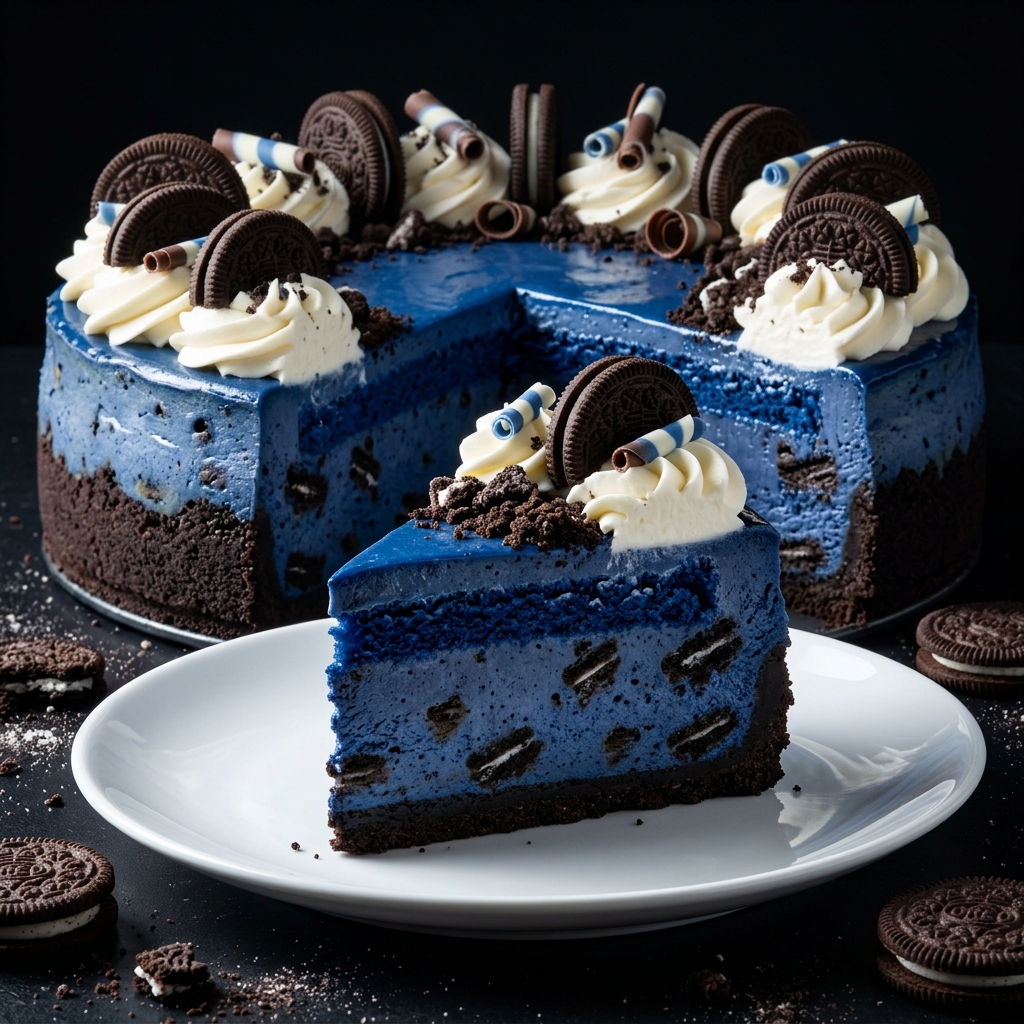
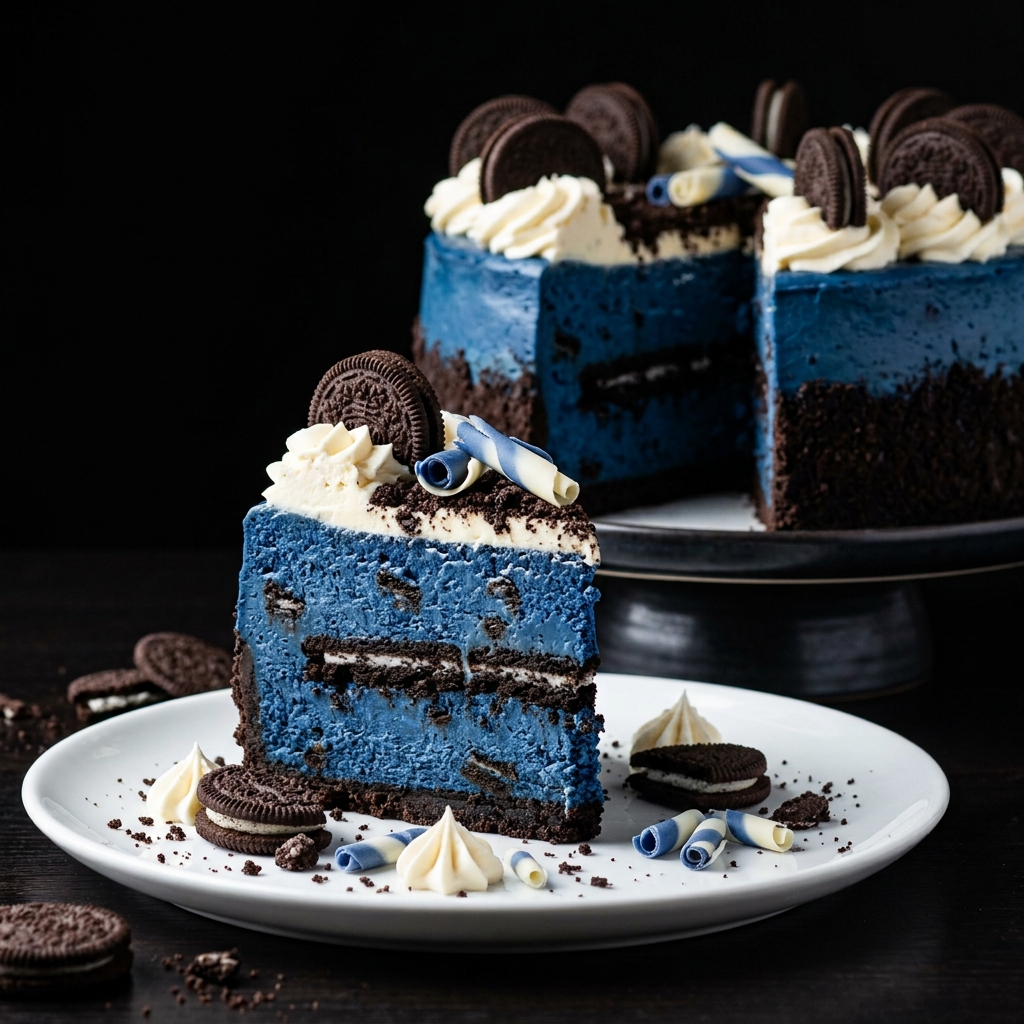
There are cheesecakes that taste good, and then there are cheesecakes that make everyone stop and look. This Blue Velvet Oreo Cheesecake combines a crisp chocolate-cookie crust, an ultra-creamy blue velvet cheesecake filling, and irresistible Oreo flavor in every bite. It is dramatic enough for celebrations yet comforting enough for a weekend dessert, and once you slice into those beautiful blue-and-black layers, it is almost impossible not to reach for another piece.
Ingredients You’ll Need
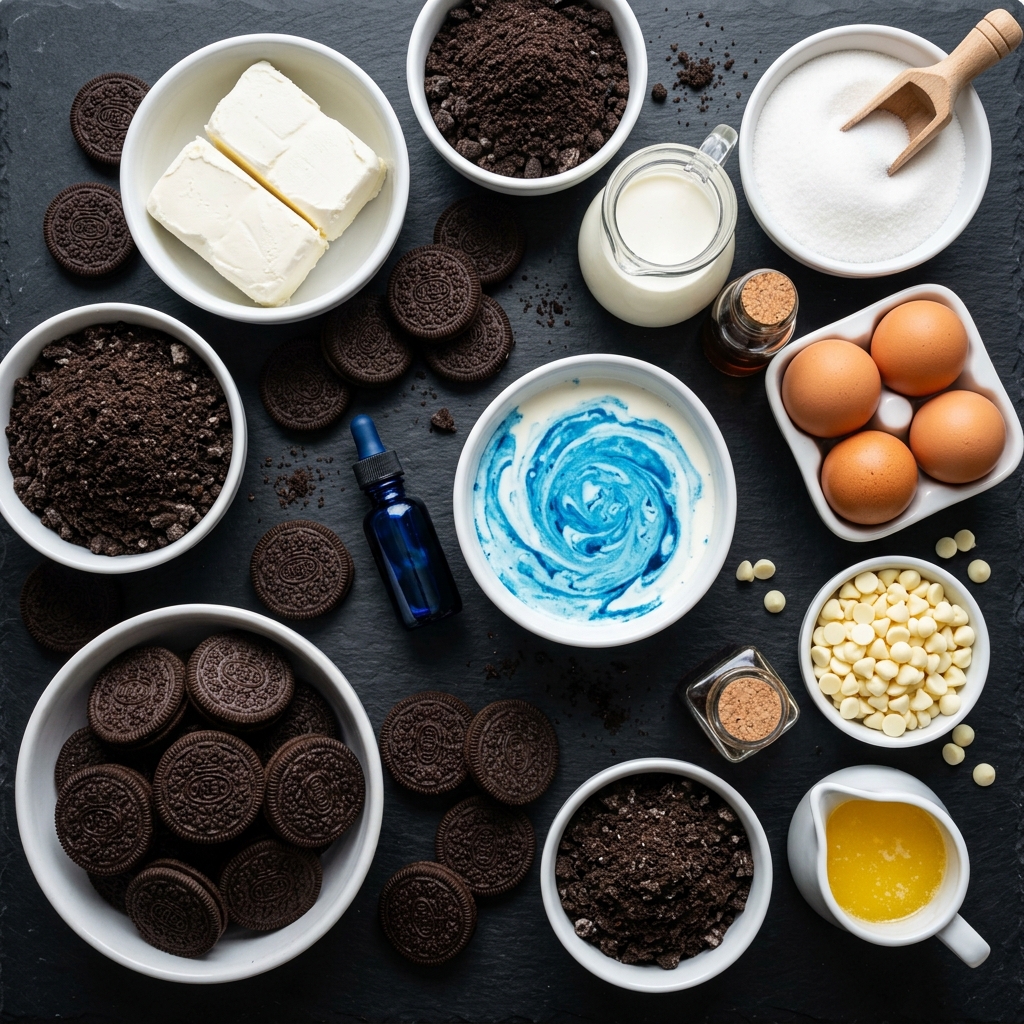
For the Oreo Crust
Oreo cookies: Use regular chocolate sandwich cookies with their filling intact. The cream filling helps the crumbs bind together and contributes extra sweetness and moisture to the crust.
Unsalted butter: Melted butter holds the crushed cookies together and creates a firm crust that slices cleanly once chilled.
For the Blue Velvet Cheesecake Filling
Full-fat cream cheese: This is one ingredient where full-fat is worth using. It creates the richest texture and helps produce a smooth, dense cheesecake.
Granulated sugar: Sugar sweetens the cream cheese while also contributing to the tender texture of the finished cheesecake.
Eggs: Eggs provide structure and help the filling set as it bakes. Add them gradually and avoid excessive mixing once they are incorporated.
Heavy cream: Heavy cream gives the cheesecake a softer, richer and more luxurious mouthfeel.
Vanilla extract: A small amount enhances the cream cheese and chocolate-cookie flavors without overpowering them.
Blue food coloring: Use a concentrated gel food coloring when possible. Gel coloring gives you a vibrant blue shade without requiring a large amount of liquid.
White chocolate: Melted white chocolate can add richness and subtle sweetness while helping create an especially smooth cheesecake texture.
Oreo cookies: Roughly chopped Oreos add little pockets of chocolate-cookie flavor throughout the creamy filling.
For the Topping
Cream cheese frosting or whipped cream: A simple white topping creates a beautiful contrast against the blue cheesecake.
Oreo cookies: Use whole cookies, halves, or crumbs for decoration.
Blue and white chocolate decorations: Optional, but these can give the finished cheesecake a polished bakery-style appearance.
Equipment
You do not need an extensive collection of equipment to make this cheesecake successfully. A few basic tools will make the process much easier.
- 9-inch springform pan
- Food processor or sturdy zip-top bag and rolling pin
- Mixing bowls
- Electric hand mixer or stand mixer
- Rubber spatula
- Measuring cups and spoons
- Small saucepan or microwave-safe bowl for melting butter
- Small bowl for melting white chocolate
- Baking sheet
- Parchment paper
- Cooling rack
- Sharp knife for slicing
A springform pan is particularly useful because its removable sides allow you to release the cheesecake without damaging the edges.
How to Make Blue Velvet Oreo Cheesecake
Step 1: Prepare the Pan
Begin by preheating your oven according to your preferred cheesecake baking temperature, generally around 325°F (165°C).
Lightly grease the inside of a 9-inch springform pan. If desired, line the bottom with parchment paper. The parchment makes transferring the cheesecake easier after it has fully chilled.
Before moving forward, make sure your cream cheese and eggs have had time to come closer to room temperature. Room-temperature ingredients blend much more smoothly and reduce the risk of a lumpy filling.
Step 2: Crush the Oreos
Place the Oreo cookies in a food processor and pulse until they become fine crumbs.
If you do not have a food processor, put the cookies into a sturdy sealed bag and crush them with a rolling pin. Try to achieve a fairly fine, even crumb rather than leaving large pieces throughout the crust.
Reserve a small amount of crumbs if you want to use them later for decoration.
Step 3: Make the Oreo Crust
Combine the crushed Oreos with melted butter and stir until the crumbs are evenly coated.
Pour the mixture into your prepared springform pan. Using the bottom of a measuring cup or a flat glass, press the crumbs firmly and evenly across the bottom.
A well-compressed crust is important. If the crumbs are loosely packed, the crust can crumble when you cut the cheesecake.
Bake the crust briefly according to your recipe’s baking schedule, then remove it and allow it to cool while you prepare the filling.
Step 4: Prepare the Cream Cheese
Place the softened cream cheese in a large mixing bowl and beat it on low to medium speed until smooth.
Scrape the sides and bottom of the bowl with a rubber spatula. This simple step is easy to overlook, but it prevents pockets of unmixed cream cheese from remaining in the batter.
Gradually add the sugar and continue mixing until the mixture is creamy and smooth.
Do not rush this stage. A smooth cheesecake begins with properly softened cream cheese.
Step 5: Add the Eggs Carefully
Add the eggs one at a time, mixing on low speed after each addition just until incorporated.
This is one of the most important techniques for achieving a creamy cheesecake. You do not want to whip a large amount of air into the batter.
Overmixing after adding eggs can introduce excessive air bubbles. Those bubbles may expand during baking and later collapse, contributing to cracks on the surface.
For a professional-looking cheesecake, mix gently and patiently.
Step 6: Add the Cream and Vanilla
Add the heavy cream and vanilla extract. Mix on low speed until everything is combined.
If your recipe includes melted white chocolate, allow it to cool slightly after melting before adding it to the cheesecake mixture. It should remain fluid but should not be extremely hot.
Pour the melted white chocolate into the filling while mixing gently.
Step 7: Create the Blue Velvet Color
Now comes the transformation that gives this cheesecake its signature appearance.
Add a small amount of concentrated blue gel food coloring to the batter and mix thoroughly. Continue adding tiny amounts until you reach the desired deep blue shade.
It is much easier to deepen the color gradually than to correct an overly intense shade.
Keep in mind that the cheesecake’s color can appear slightly different before and after baking, so aim for a rich, saturated blue rather than relying on a pale shade.
For the most elegant result, choose a deep velvet blue rather than an extremely bright neon blue.
Step 8: Fold in the Oreo Pieces
Roughly chop several Oreo cookies and gently fold them into the blue cheesecake batter using a rubber spatula.
Do not crush them into tiny crumbs. Slightly larger pieces create appealing chocolate-cookie pockets throughout the cheesecake and make every slice more interesting.
Save several whole or halved Oreos for decorating the finished cheesecake.
Step 9: Pour the Filling Over the Crust
Pour the blue cheesecake batter over the cooled Oreo crust.
Gently spread the top with a spatula until it is relatively even.
Tap the pan very lightly against the counter a couple of times to encourage large trapped air bubbles to rise to the surface. Do not bang the pan aggressively, as this can disturb the crust.
If you notice visible bubbles on the surface, pop them carefully with a toothpick.
Step 10: Bake Gently
Place the cheesecake in the preheated oven and bake until the edges are set while the center still has a slight jiggle.
Do not wait for the entire cheesecake to become completely firm inside the oven. Cheesecake continues to set as it cools.
One of the biggest mistakes beginners make is overbaking. A cheesecake that looks completely firm while still in the oven may become dry or overly dense after cooling.
Depending on your oven and the exact recipe proportions, baking time can vary. Start checking toward the earlier end of the expected baking window rather than relying solely on the clock.
Step 11: Cool Slowly
Once baked, turn off the oven and, if appropriate for your baking method, allow the cheesecake to rest inside the cooling oven with the door slightly open.
Afterward, transfer it to a cooling rack and let it come down toward room temperature.
Avoid immediately placing a piping-hot cheesecake into the refrigerator. Sudden temperature changes can encourage cracking and condensation.
Step 12: Chill Thoroughly
Once the cheesecake has cooled sufficiently, cover it and refrigerate it for several hours, preferably overnight.
This chilling period is not optional if you want beautiful slices and the best texture.
As the cheesecake chills, the filling becomes firmer, creamier and easier to cut. The Oreo crust also has time to settle into a cohesive base.
The Secret to a Smooth, Crack-Free Cheesecake
The most important secret is not a complicated ingredient or expensive piece of equipment. It is temperature control and gentle mixing.
Room-temperature cream cheese blends much more easily than cold cream cheese. When cold cream cheese is beaten aggressively to eliminate lumps, you can accidentally incorporate too much air into the batter. That air expands during baking and can contribute to cracks.
Another important factor is knowing when the cheesecake is actually finished. The center should have a gentle wobble rather than being completely rigid. If you continue baking until the center looks fully firm, the cheesecake can become overbaked by the time it cools.
A water bath can also be used if you want particularly gentle, even baking. It creates a moist environment in the oven and helps moderate the temperature around the cheesecake. If you use one, wrap the outside of the springform pan carefully to prevent water from entering the crust.
What Makes Blue Velvet Cheesecake Different?
The blue color is what catches the eye, but the real appeal comes from the combination of flavors and textures. The creamy cheesecake filling provides richness, while the Oreo crust contributes a deep chocolate note and satisfying contrast.
Unlike a plain vanilla cheesecake, this dessert has a stronger visual personality. That makes it particularly useful when you want a dessert that doubles as part of the table presentation.
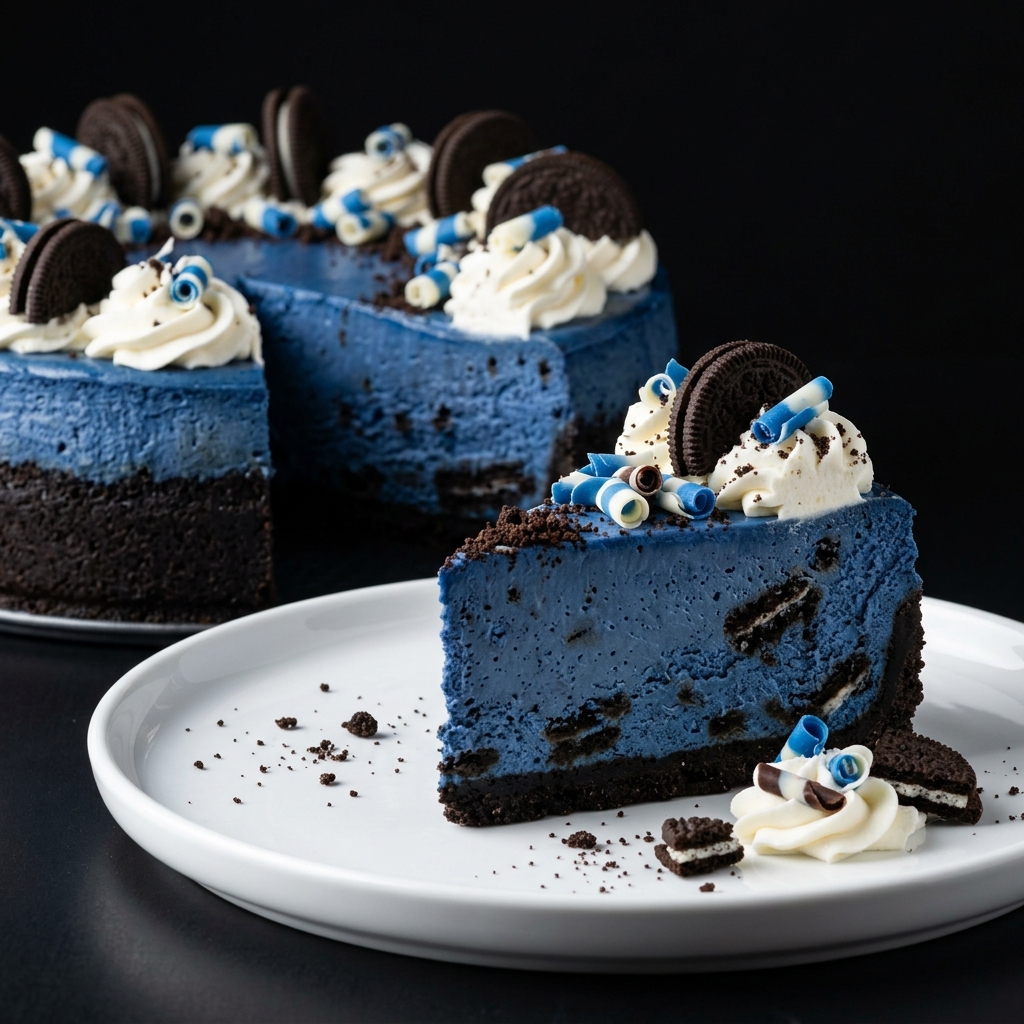
The secret to keeping it elegant rather than overly decorative is restraint. Let the rich blue cheesecake remain the star. A few Oreo cookies, crumbs, white cream accents and subtle chocolate decorations are enough to create a beautiful finish.
Recipe Variations
Blueberry Oreo Cheesecake
For a fruity variation, add a blueberry component to the finished cheesecake. A spoonful of homemade blueberry sauce or a thin blueberry topping can complement the blue color beautifully while introducing a bright fruity flavor.
White Chocolate Blue Velvet Cheesecake
Increase the white chocolate component for a richer, sweeter dessert. White chocolate pairs naturally with the creamy cheesecake and creates a luxurious contrast with the dark Oreo crust.
Mini Blue Velvet Oreo Cheesecakes
Instead of making one large cheesecake, divide the crust and filling among individual cheesecake molds or a lined muffin pan. Mini versions are excellent for parties because guests can enjoy individual portions without slicing a whole cake.
Extra-Oreo Blue Velvet Cheesecake
If you are a serious Oreo fan, increase the amount of chopped cookies folded into the filling and finish the cheesecake with a generous layer of Oreo crumbs. You can also press halved cookies around the outer edge for a dramatic presentation.
No-Bake Version
A no-bake adaptation can be made by preparing an Oreo crust and using a stabilized cream-cheese filling that sets in the refrigerator rather than the oven. The texture will be softer and mousse-like compared with a traditional baked cheesecake, but it can be an excellent option when you want to avoid using the oven.
Expert Tips for the Best Results
Use full-fat cream cheese. Reduced-fat cream cheese contains more moisture and generally does not provide the same rich, stable texture.
Do not use cold cream cheese. Let it soften naturally before mixing. This makes a significant difference in smoothness.
Avoid overmixing. Especially after the eggs are added, mix only until the ingredients are incorporated.
Use gel food coloring. Concentrated gel coloring gives you a stronger blue shade without adding unnecessary liquid to the batter.
Do not overbake. A slight jiggle in the center is desirable. The cheesecake will firm considerably as it cools.
Chill overnight when possible. While several hours may be enough, an overnight chill gives the cheesecake excellent structure and makes slicing much easier.
Use a warm knife for clean slices. Dip a sharp knife in hot water, wipe it dry, and slice. Clean and rewarm the knife between cuts for smooth, bakery-style portions.
Decorate after chilling. Adding the final Oreo cookies, cream and decorative elements after the cheesecake has completely chilled keeps the presentation cleaner.
Do not rush the cooling process. Cheesecake rewards patience. Slow cooling helps preserve its texture and appearance.
Keep the decoration proportional. The blue velvet filling and Oreo crust should remain visually dominant. Too many toppings can hide the beautiful layers that make this cheesecake special.
Make-Ahead Options
One of the best things about this Blue Velvet Oreo Cheesecake is that it is an excellent make-ahead dessert. In fact, preparing it a day before serving is often preferable because the extended chilling time allows the cheesecake to fully set and develop its best texture.
You can bake the cheesecake up to 2 days ahead and keep it covered in the refrigerator. Wait until the cheesecake is completely chilled before adding decorative toppings such as whipped cream, Oreo cookies, cookie crumbs, or chocolate decorations. This keeps the decorations looking fresh and prevents them from becoming soft.
For longer storage, the undecorated cheesecake can also be frozen. Wrap the completely chilled cheesecake tightly in plastic wrap, followed by a layer of aluminum foil, and freeze it for up to about 1 month for the best quality. Thaw it gradually in the refrigerator rather than at room temperature.
If you are preparing the cheesecake for a party, this make-ahead flexibility can make the day of the event much easier. The cheesecake can be fully chilled and ready to decorate while you focus on the rest of the meal.
What to Serve With Blue Velvet Oreo Cheesecake
This cheesecake is already rich and indulgent, so the best accompaniments are those that provide contrast rather than competing with its creamy chocolate flavor.
Fresh Berries
Fresh strawberries, raspberries, blueberries, or blackberries can add a bright, slightly tart element to each serving. Berries also look beautiful against the deep blue cheesecake.
Whipped Cream
A small dollop of lightly sweetened whipped cream adds softness without overwhelming the cheesecake. For an especially attractive presentation, pipe small swirls around the edge and finish them with Oreo crumbs.
Berry Sauce
A thin drizzle of homemade blueberry or raspberry sauce provides acidity that cuts through the richness of the cream cheese. The vibrant fruit color also complements the blue velvet filling.
Vanilla Ice Cream
For an especially indulgent dessert plate, serve a small scoop of vanilla ice cream beside a slice of cheesecake. The cool, creamy ice cream works particularly well with the chocolate Oreo crust.
Coffee
A cup of freshly brewed coffee is a simple but excellent pairing. The bitterness of coffee balances the sweetness of the cheesecake and enhances the chocolate notes from the Oreo cookies.
Hot Chocolate
For a truly decadent dessert experience, serve a small cup of hot chocolate alongside the cheesecake. This is particularly appealing during colder months or holiday gatherings.
How to Store Blue Velvet Oreo Cheesecake
Proper storage is essential because cheesecake contains dairy and eggs.
Once the cheesecake has completely cooled, cover it tightly with plastic wrap or place it in an airtight cake container. Refrigerate it promptly and keep it chilled until you are ready to serve.
Properly refrigerated, the cheesecake is best enjoyed within 4 to 5 days. Keep it away from strongly scented foods because cheesecake can absorb odors from the refrigerator.
If the cheesecake has already been decorated with whipped cream, cookies, or other toppings, the toppings may soften over time. For the freshest presentation, add delicate decorations shortly before serving whenever possible.
Freezing Individual Slices
Freezing individual slices is particularly convenient if you do not expect to serve the entire cheesecake at once.
First, chill the cheesecake thoroughly. Slice it into portions, then place the slices on a parchment-lined tray and freeze them uncovered until firm. Wrap each frozen slice individually in plastic wrap and then place the wrapped pieces in a freezer-safe container or bag.
When you want a serving, transfer one slice to the refrigerator and allow it to thaw slowly. This helps maintain the creamy texture.
Avoid repeatedly freezing and thawing the entire cheesecake because temperature fluctuations can negatively affect the texture.
How to Get Beautiful Cheesecake Slices
Presentation matters, especially with a dessert as visually striking as Blue Velvet Oreo Cheesecake.
Start with a completely chilled cheesecake. A warm or partially chilled cheesecake is much more difficult to slice neatly.
Use a long, sharp knife. Dip the blade into hot water, wipe it completely dry, and make one smooth cut through the cheesecake. Avoid using a sawing motion.
Clean the knife after every slice, then repeat the warm-water process. This small technique makes an enormous difference.
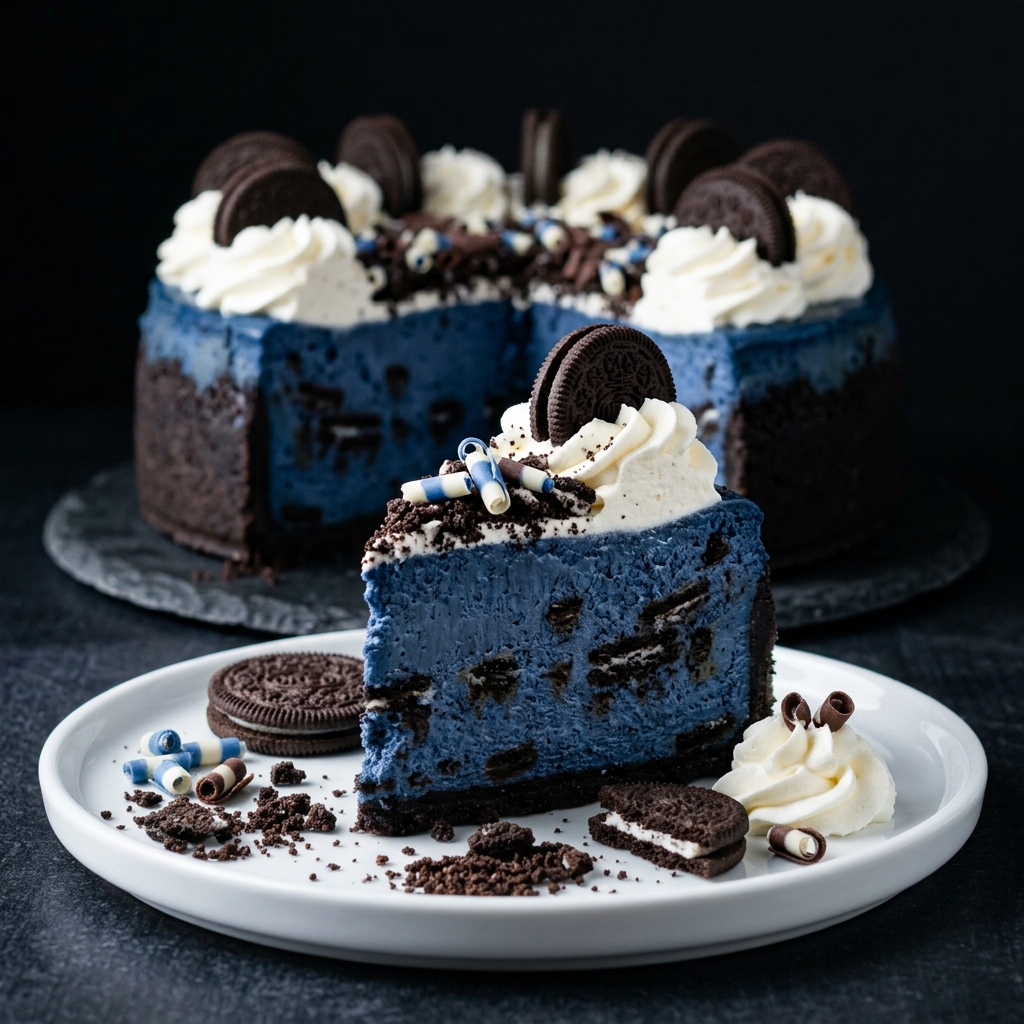
For an especially attractive serving, place the slice slightly off-center on a modern white dessert plate. Add a few Oreo crumbs, one or two Oreo cookie pieces, and a small amount of whipped cream or berry sauce around the slice.
The contrast between the dark Oreo crust, vivid blue cheesecake and white plate makes the dessert particularly striking.
Common Mistakes to Avoid
Using Cold Ingredients
Cold cream cheese can remain lumpy even after extensive mixing. Bring the cream cheese and eggs closer to room temperature before beginning.
Overbeating the Batter
More mixing does not necessarily mean a better cheesecake. Excessive beating incorporates air, which can contribute to cracks and an uneven surface.
Adding Too Much Food Coloring
Adding large amounts of liquid coloring can alter the consistency of the batter. Concentrated gel coloring is a better choice because a small amount can create a deep color.
Overbaking
This is perhaps the most common cheesecake mistake. The center should retain a gentle wobble when the cheesecake comes out of the oven.
Cutting Before Chilling
Even if the cheesecake looks set, cutting it too soon can produce soft, messy slices. Give it sufficient refrigeration time.
Removing It From the Pan Too Early
The cheesecake needs to be firm before you remove the springform sides. Trying to release a warm cheesecake can damage the edges.
Adding Wet Toppings Too Early
Fruit sauces and other moist toppings can gradually soften the cheesecake surface. Add them shortly before serving when possible.
Frequently Asked Questions
Can I make Blue Velvet Oreo Cheesecake without a springform pan?
Yes. A deep round cake pan can work, although removing the cheesecake may be more difficult. A springform pan is preferred because its removable sides make it much easier to release the finished cheesecake without damaging the edges.
Why did my cheesecake crack?
Cracking can happen for several reasons, including overmixing, overbaking, rapid temperature changes, or baking at an excessively high temperature. A cheesecake does not have to look completely firm when it leaves the oven. A slight center wobble is desirable.
If your cheesecake does develop a crack, there is no need to discard it. Cream, Oreo crumbs, chocolate decorations, or fresh berries can easily turn an imperfect surface into an attractive finished dessert.
Can I use regular liquid food coloring?
You can, but gel food coloring is generally preferable for this recipe. Gel coloring is highly concentrated, allowing you to achieve an intense blue shade without adding as much liquid to the cheesecake batter.
How long should cheesecake chill before serving?
For the best texture, refrigerate it for at least several hours, preferably overnight. The longer chilling period allows the filling to firm properly and makes it much easier to create clean slices.
Can I make this cheesecake without Oreos?
Yes. You can substitute another chocolate sandwich cookie or use a homemade chocolate-cookie crust. Keep in mind that changing the cookie can slightly alter the sweetness and texture of the crust.
Can I make mini Blue Velvet Oreo Cheesecakes?
Absolutely. Mini cheesecakes are a wonderful option for parties, birthdays and gatherings. Divide the crust mixture among individual molds or lined muffin cups, add the filling, and adjust the baking time because smaller cheesecakes will cook much faster than a full-size cheesecake.
Can I freeze Blue Velvet Oreo Cheesecake?
Yes. The cheesecake freezes well when properly wrapped. For the best quality, freeze it without delicate toppings and thaw it gradually in the refrigerator before serving.
How do I prevent the Oreo crust from falling apart?
The key is using enough melted butter and pressing the crumbs firmly into the pan. Use the flat bottom of a measuring cup or glass to compact the crust evenly. Allowing the crust to cool and set before adding the filling also helps.
Why is my cheesecake too soft?
A cheesecake can remain soft if it has not been chilled long enough, if it was underbaked, or if the ingredient proportions contain too much liquid. Always allow the cheesecake to cool completely before refrigerating it, then give it several hours to firm up.
Blue Velvet Oreo Cheesecake
Ingredients
Equipment
Method
- Preheat the oven to 325°F (165°C). Lightly grease a 9-inch springform pan and line the bottom with parchment paper if desired.
- Crush the Oreo cookies into fine crumbs. Combine the crumbs with melted butter until evenly moistened.
- Press the mixture firmly and evenly into the bottom of the springform pan. Use the flat bottom of a glass or measuring cup to compact the crust.
- Bake for 8–10 minutes, then remove from the oven and allow to cool slightly.
- Beat the softened cream cheese on low to medium speed until smooth. Scrape down the sides of the bowl as needed.
- Add the granulated sugar gradually and mix until smooth and creamy.
- Add the eggs one at a time, mixing on low speed just until each egg is incorporated. Avoid overmixing.
- Add the heavy cream and vanilla extract and mix gently.
- Pour in the melted white chocolate once it has cooled slightly. Mix until incorporated.
- Add the blue gel food coloring gradually until the filling reaches a rich, deep blue velvet shade.
- Gently fold in the chopped Oreo cookies with a rubber spatula.
- Pour the blue cheesecake mixture over the cooled Oreo crust. Smooth the surface with a spatula.
- Gently tap the pan against the counter a couple of times to release any large air bubbles.
- Bake at 325°F (165°C) for approximately 55–65 minutes, or until the edges are set and the center still has a gentle wobble.
- Do not wait for the entire cheesecake to become completely firm in the oven. It will continue setting as it cools.
- Turn off the oven and allow the cheesecake to cool gradually. Remove it from the oven and place it on a cooling rack.
- Let it cool to room temperature before covering and refrigerating.
- Refrigerate the cheesecake for at least 6 hours, preferably overnight. Thorough chilling is essential for a firm, creamy texture and clean slices.
- Beat the heavy whipping cream, powdered sugar and vanilla until medium-stiff peaks form.
- Spread or pipe the whipped cream over the completely chilled cheesecake.
- Decorate with whole or halved Oreo cookies, crushed Oreo crumbs, and optional white chocolate curls or blue-and-white chocolate decorations.
- For clean slices, dip a sharp knife in hot water, wipe it dry, and slice the cheesecake. Clean and rewarm the knife between cuts.
Notes
Bring cream cheese and eggs to room temperature before mixing to help prevent lumps.
Use gel food coloring rather than a large amount of liquid coloring for a vivid blue color without unnecessarily changing the batter consistency.
Mix gently once the eggs are added to minimize excess air and reduce the chance of cracks.
The cheesecake should have a slight wobble in the center when removed from the oven.
Allow the cheesecake to chill thoroughly before decorating or slicing.
For the cleanest slices, use a warm, dry knife and wipe it between cuts.
The cheesecake can be prepared 1–2 days ahead and kept covered in the refrigerator.
Store leftovers refrigerated in an airtight container and enjoy within 4–5 days.
For an especially polished presentation, decorate with white whipped cream and Oreo pieces immediately before serving.

Hi, I’m Clara, the creator of Barakala. I love sharing simple, comforting, and delicious recipes that make everyday cooking easier and more enjoyable for home cooks.