
There is something irresistible about homemade Cherry Garcia ice cream: rich, velvety ice cream packed with juicy cherries and generous pieces of chocolate in every spoonful. This easy homemade version brings that classic cherry-and-chocolate combination straight to your freezer, with a creamy texture and fresh flavor that makes store-bought ice cream feel a little less exciting.
Ingredients for Cherry Garcia Ice Cream
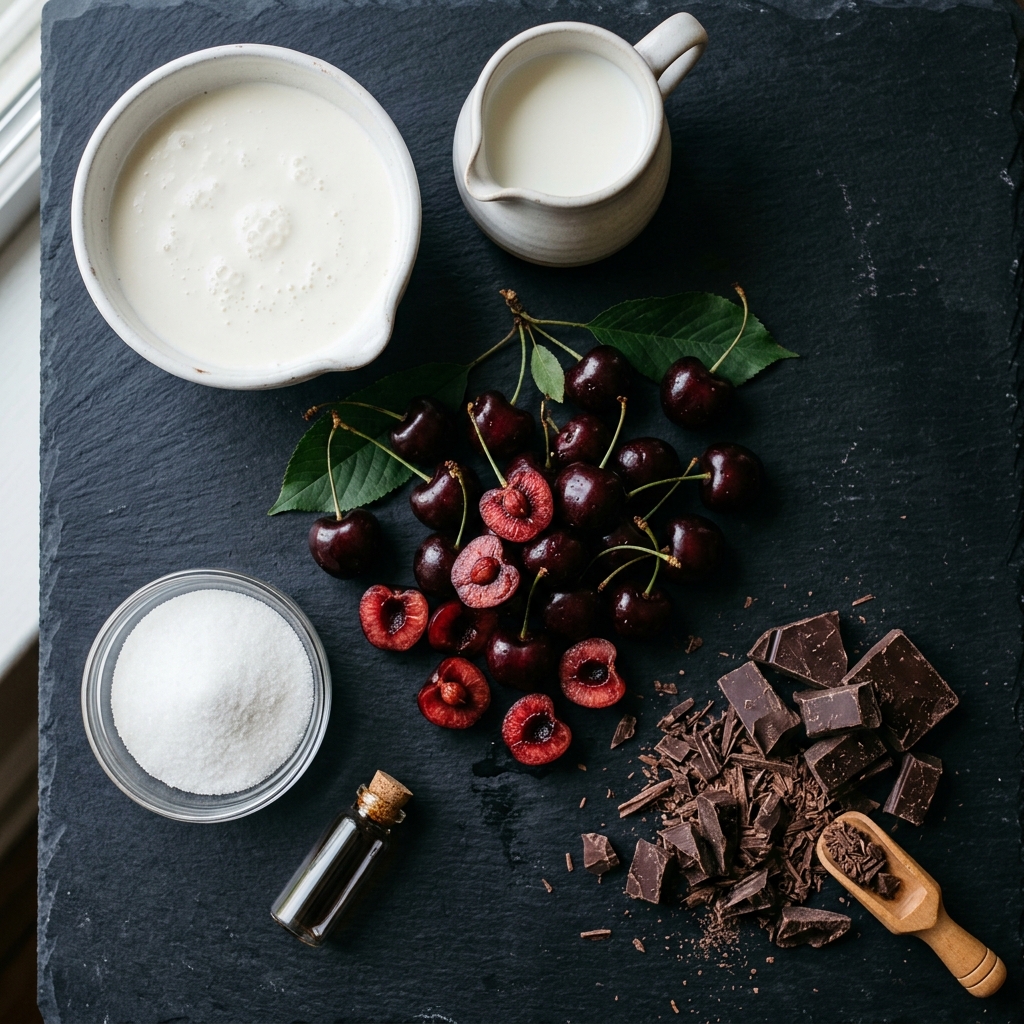
The beauty of this Cherry Garcia ice cream recipe is that it uses simple ingredients, but each one has an important job. Because there are relatively few ingredients, choosing good-quality dairy, ripe cherries, and flavorful chocolate will make a noticeable difference in the finished ice cream.
Fresh Cherries
You will need about 2 cups fresh sweet cherries, pitted and roughly chopped.
Fresh cherries give this ice cream its signature fruit flavor and beautiful color. Look for cherries that are plump, firm, deeply colored, and fragrant. Dark sweet cherries work particularly well because they provide a naturally sweet-tart flavor that complements the chocolate.
If fresh cherries are unavailable, frozen cherries can also be used. Thaw and drain them thoroughly before preparing them so that excess water does not make the ice cream icy.
Heavy Whipping Cream
Use 2 cups heavy whipping cream.
Heavy cream provides much of the luxurious richness and creamy mouthfeel associated with good homemade ice cream. For the smoothest texture, use full-fat cream rather than a reduced-fat substitute.
Whole Milk
Add 1 cup whole milk.
Milk lightens the richness of the heavy cream while still providing enough fat to keep the ice cream creamy. Whole milk is preferable here because low-fat milk can produce a harder, icier texture.
Granulated Sugar
Use ¾ cup granulated sugar, divided if desired between the cherry mixture and ice cream base.
Sugar does more than simply sweeten ice cream. It also affects the freezing point, helping the finished dessert remain scoopable rather than becoming rock-hard. Reducing the sugar substantially can therefore change the texture as well as the flavor.
Pure Vanilla Extract
Add 1 teaspoon pure vanilla extract.
Vanilla rounds out the flavor of the cream and cherries and helps tie the chocolate into the mixture. Pure vanilla extract is especially noticeable in a recipe with such a short ingredient list.
Chocolate
Use 4–5 ounces bittersweet or semisweet chocolate, finely chopped or cut into small chunks.
Chocolate is one of the defining ingredients in Cherry Garcia ice cream. Chopping some pieces finely and leaving others slightly larger gives you a better distribution of chocolate throughout the finished dessert.
For the best texture, avoid making every chocolate piece extremely large. Frozen chocolate becomes firm, so smaller irregular pieces are much easier and more pleasant to bite into.

How to Make Cherry Garcia Ice Cream
Making homemade ice cream is much easier when you understand what each stage is accomplishing. The goal is to build a flavorful base, concentrate the cherries, cool everything properly, and then churn the mixture until it reaches a thick, creamy consistency.
Step 1: Prepare the Cherries
Wash, dry, and pit the cherries carefully. Roughly chop them, keeping some small pieces and some slightly larger pieces for texture.
Place the chopped cherries in a saucepan with about ¼ cup of the sugar. Cook over medium heat for approximately 5–8 minutes, stirring frequently.
The cherries will begin releasing their juices as they soften. Continue cooking until they are tender and the mixture becomes slightly syrupy.
Do not completely dissolve the cherries into a puree. One of the best parts of Cherry Garcia ice cream is discovering little pieces of real cherry throughout the ice cream.
Remove the saucepan from the heat and allow the cherries to cool completely.
Step 2: Cool the Cherry Mixture Thoroughly
Transfer the cooked cherries and their juices to a clean container and refrigerate until completely chilled.
This step is more important than it may seem.
Adding warm cherries to an ice cream base can raise the temperature of the mixture and interfere with the freezing process. It can also cause the finished ice cream to develop a less desirable texture.
For the best results, prepare the cherries several hours ahead or refrigerate them overnight.
Step 3: Prepare the Cream Base
In a large mixing bowl, combine the heavy cream, whole milk, remaining sugar, and vanilla extract.
Whisk until the sugar is completely dissolved.
There is no need to whip the cream. You simply want a smooth, evenly mixed liquid base. Over-whipping the cream at this stage can create an unnecessarily heavy texture and is not needed for a standard churned ice cream method.
Taste a small amount of the base before adding the cherries. It should taste pleasantly sweet and creamy. Remember that freezing dulls sweetness slightly, so the mixture should taste a little sweeter than you ultimately want the frozen ice cream to taste.
Step 4: Combine the Cherries and Ice Cream Base
Once the cherry mixture is completely cold, stir it into the cream mixture.
You can add all of the cherry juices for a stronger cherry flavor and naturally pink color, or reserve a small amount of the cherry mixture to swirl through the ice cream later.
For a more visually dramatic dessert, gently crush a portion of the cherries while leaving the rest in recognizable pieces. This creates a beautiful combination of cherry flavor throughout the base and visible fruit pieces in every scoop.
Step 5: Chill the Ice Cream Mixture
Cover the mixture and refrigerate it for at least 2–4 hours, preferably until thoroughly cold.
If you have time, chilling the base overnight is even better.
A very cold base churns more efficiently because the ice cream maker does not have to spend as much time lowering the mixture to freezing temperature. Faster freezing generally means smaller ice crystals, which translates into smoother homemade ice cream.
Step 6: Churn the Ice Cream
Pour the chilled mixture into your ice cream maker and churn according to the manufacturer’s instructions.
Depending on the machine, this typically takes around 20–30 minutes.
Watch the consistency rather than relying exclusively on the clock. The ice cream should become noticeably thicker and resemble soft serve when it is ready for the next stage.
Avoid overfilling your machine. Ice cream expands as it churns, and giving it adequate room allows the mixture to incorporate air properly.
Step 7: Add the Chocolate
When the ice cream is almost finished churning, gradually add the chopped chocolate.
Adding the chocolate near the end prevents the pieces from sinking to the bottom and helps distribute them throughout the ice cream.
For an especially attractive result, use a mixture of finely chopped chocolate and slightly larger chunks. The smaller pieces become scattered throughout the base while the larger pieces provide satisfying bites.
Step 8: Layer and Freeze
Transfer the freshly churned ice cream to a freezer-safe container.
For an extra-special presentation, spoon in a layer of ice cream, add a few additional cherries and chocolate pieces, then repeat the layers until the container is full.
Gently swirl the mixture with a spoon or spatula. Do not overmix it, because you want visible pockets of cherry and chocolate rather than a completely uniform mixture.
Smooth the top, press a piece of parchment or plastic wrap directly against the surface if desired, and cover tightly.
Freeze for at least 4–6 hours, or until firm enough to scoop.
The Secret to Better Homemade Cherry Garcia Ice Cream
The biggest difference between ordinary homemade ice cream and truly memorable homemade ice cream often comes down to how the fruit is handled.
Fresh cherries contain a significant amount of water. If raw cherries are simply stirred into the ice cream base, that water freezes into ice crystals, potentially creating firm or icy fruit pieces. Gently cooking the cherries first concentrates their flavor while reducing some of that excess moisture.
There is another advantage, too: cooking the cherries with sugar creates a concentrated cherry mixture that tastes much more intense once frozen. The result is not merely sweet cream with occasional fruit—it is a dessert where the cherry flavor remains noticeable from the first bite to the last.
Chocolate deserves similar attention. Instead of treating it as a garnish, distribute it throughout the ice cream so that every scoop contains a combination of creamy base, cherry, and chocolate. That balance is what makes this flavor so satisfying.
Delicious Variations to Try
Once you have mastered the basic Cherry Garcia ice cream recipe, there are several ways to customize it without losing its classic character.
Extra-Chocolate Cherry Ice Cream
If you are a serious chocolate lover, increase the chocolate to about 6 ounces. Use a combination of chopped dark chocolate and semisweet chocolate for deeper flavor.
You can also drizzle a small amount of melted chocolate into the ice cream during the final stage of churning to create delicate chocolate ribbons.
Fresh Cherry Swirl Version
Reserve some of the cooked cherry mixture before combining everything with the cream base.
After churning, layer the ice cream with spoonfuls of the reserved cherry mixture. Swirl gently with a butter knife or thin spatula.
This creates dramatic streaks of deep red cherry throughout the pale pink ice cream.
Dark Chocolate Cherry Ice Cream
Replace the semisweet chocolate with good-quality dark chocolate.
The slightly bitter chocolate creates a sophisticated contrast against the naturally sweet cherries and creamy base.
Chocolate-Covered Cherry Style
For an indulgent dessert, coat some chopped cherries lightly in melted chocolate, allow them to set, then fold them into the finished ice cream.
The result gives you little chocolate-covered cherry bites scattered throughout the frozen dessert.
Cherry Almond Variation
Add a small amount of almond extract along with the vanilla.
Use restraint because almond extract is powerful. Even a small quantity can transform the flavor and create a cherry-almond combination reminiscent of classic cherry desserts.
Expert Tips for Creamy Homemade Ice Cream
Use ripe cherries. The quality of the fruit has a direct effect on the final flavor. Bland cherries will remain bland even after being combined with cream and sugar.
Chill everything thoroughly. Cold ingredients help the ice cream freeze more efficiently and can contribute to a smoother final texture.
Do not skip cooking the cherries. This helps concentrate their flavor and reduces some of the excess moisture that can otherwise become icy when frozen.
Choose good chocolate. Since chocolate is one of only a few major ingredients, its flavor will be noticeable. A good-quality semisweet or bittersweet chocolate is usually preferable to overly sweet chocolate.
Keep the chocolate pieces reasonably small. Extremely large pieces become very hard when frozen. Small chunks and shavings provide a better texture.
Do not over-churn. Once the ice cream reaches a thick soft-serve consistency, it is generally ready for the chocolate and freezing stage. Continuing unnecessarily can negatively affect the texture.
Use a shallow freezer-safe container. A wider, shallower container can help the freshly churned ice cream freeze more quickly and evenly than a very deep container.
Let it soften before scooping. Homemade ice cream can freeze harder than commercial ice cream because it typically contains fewer stabilizers. Allow it to sit at room temperature for approximately 5–10 minutes before serving if it is too firm to scoop.
Taste the base before freezing. This is one of the most useful professional habits when making homemade ice cream. Adjusting sweetness or flavor before freezing is much easier than trying to correct the finished frozen dessert.
Why This Recipe Works
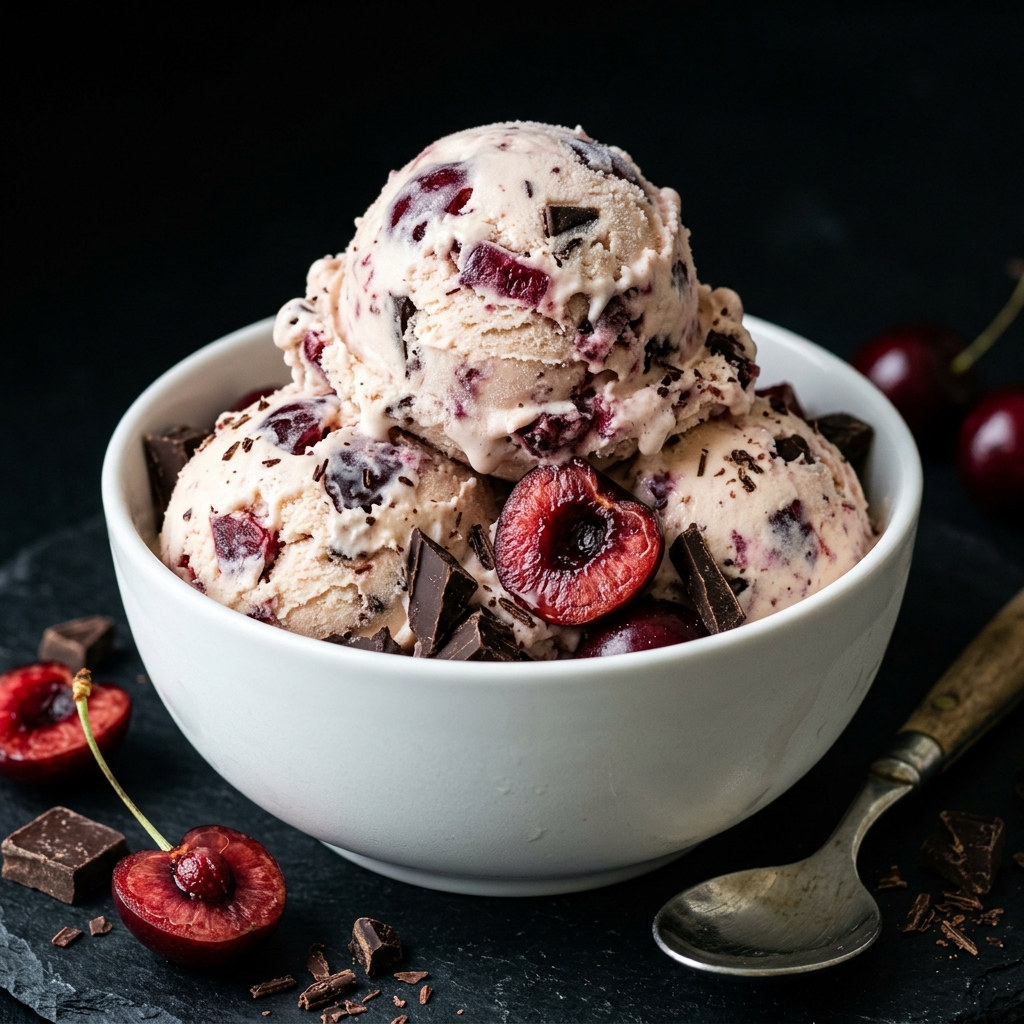
Every component of this Cherry Garcia ice cream has a purpose. The heavy cream contributes richness, whole milk keeps the base balanced, sugar provides sweetness while improving scoopability, and vanilla rounds out the flavor.
The cherries provide brightness and acidity that prevent the dairy from becoming overwhelmingly rich. Meanwhile, chocolate adds bitterness, texture, and depth.
The result is a carefully balanced frozen dessert: creamy but not flat, fruity but not overly tart, and chocolaty without allowing the chocolate to completely overpower the cherries.
And that is exactly what makes this homemade version worth making from scratch. You are not simply freezing a sweet cream mixture—you are building layers of flavor and texture that come together in every spoonful.
Make-Ahead Options
Cherry Garcia ice cream is an excellent make-ahead dessert because the flavor and texture actually benefit from having enough time to firm up properly in the freezer.
You can prepare the cherry mixture 1–2 days in advance. Once cooked and cooled, transfer it to an airtight container and refrigerate it until you are ready to make the ice cream.
The complete ice cream can also be prepared a day before serving. In fact, making it the night before is one of the easiest ways to ensure that it has enough time to freeze completely.
For entertaining, you can prepare the ice cream several days ahead and keep it tightly covered in the freezer. When serving, give it a few minutes at room temperature to soften slightly so you can create attractive, generous scoops.
If you are making this recipe for a party, birthday celebration, barbecue, or summer gathering, preparing the ice cream ahead of time means dessert is already taken care of when your guests arrive.
What to Serve With Cherry Garcia Ice Cream
Cherry Garcia ice cream is rich enough to stand alone, but the right accompaniment can turn a simple scoop into an impressive dessert.
Fresh Cherries
Serve each scoop with a few fresh cherries on top. Leave the stems attached to some cherries for a beautiful presentation.
The fresh fruit provides a juicy contrast to the frozen creaminess of the ice cream.
Chocolate Sauce
A warm chocolate sauce makes an especially indulgent topping. Drizzle a small amount over the ice cream immediately before serving.
For an attractive dessert, allow some sauce to run naturally down the sides rather than completely covering the ice cream.
Whipped Cream
A small swirl of lightly sweetened whipped cream adds softness and makes the dessert look more elaborate without overwhelming the cherry-and-chocolate flavor.
Chocolate Shavings
Use a vegetable peeler or sharp knife to create thin chocolate curls or shavings. Scatter them over the top just before serving.
Brownie Pieces
For an extra-decadent dessert, serve a scoop of Cherry Garcia ice cream over a warm chocolate brownie.
The contrast between the warm brownie and cold ice cream is particularly satisfying.
Chocolate Chip Cookies
A crisp chocolate cookie provides texture against the smooth ice cream. You can also sandwich a scoop of slightly softened ice cream between two cookies for a homemade frozen dessert sandwich.
Cherry Pie
For a special occasion, serve Cherry Garcia ice cream alongside a warm slice of cherry pie. The combination intensifies the cherry flavor while giving you a wonderful contrast between warm pastry and cold ice cream.
How to Store Cherry Garcia Ice Cream
Proper storage is essential if you want homemade ice cream to remain creamy and flavorful instead of becoming dry, icy, or covered with freezer crystals.
Transfer the finished ice cream to a shallow, airtight, freezer-safe container. Smooth the surface as much as possible before sealing it.
For additional protection, place a piece of parchment paper or freezer-safe plastic wrap directly against the surface of the ice cream before putting the lid on the container. This reduces exposure to air and helps minimize freezer burn.
Keep the container toward the back of the freezer where the temperature remains more stable. Avoid storing it in the freezer door, where frequent opening and closing can expose the ice cream to temperature fluctuations.
For the best texture and flavor, enjoy homemade ice cream within approximately 1–2 weeks. It can remain frozen longer, but its texture and flavor are generally at their best when consumed relatively soon after preparation.
Can You Refreeze Melted Ice Cream?
It is best to avoid repeatedly allowing ice cream to melt and then refreezing it.
As ice cream melts, the water within it separates and can form larger ice crystals when frozen again. This can turn a smooth dessert into something noticeably icy.
For that reason, take out only the amount you plan to serve and return the remaining container to the freezer promptly.
How to Get Perfect Scoops
If your Cherry Garcia ice cream has been frozen overnight and feels extremely firm, do not immediately try to force your scoop through it.
Instead, let the container sit at room temperature for approximately 5–10 minutes.
Dip a sturdy ice cream scoop in warm water, shake off the excess, and then run it across the surface of the ice cream. The slightly warmed scoop should glide through the ice cream more easily.
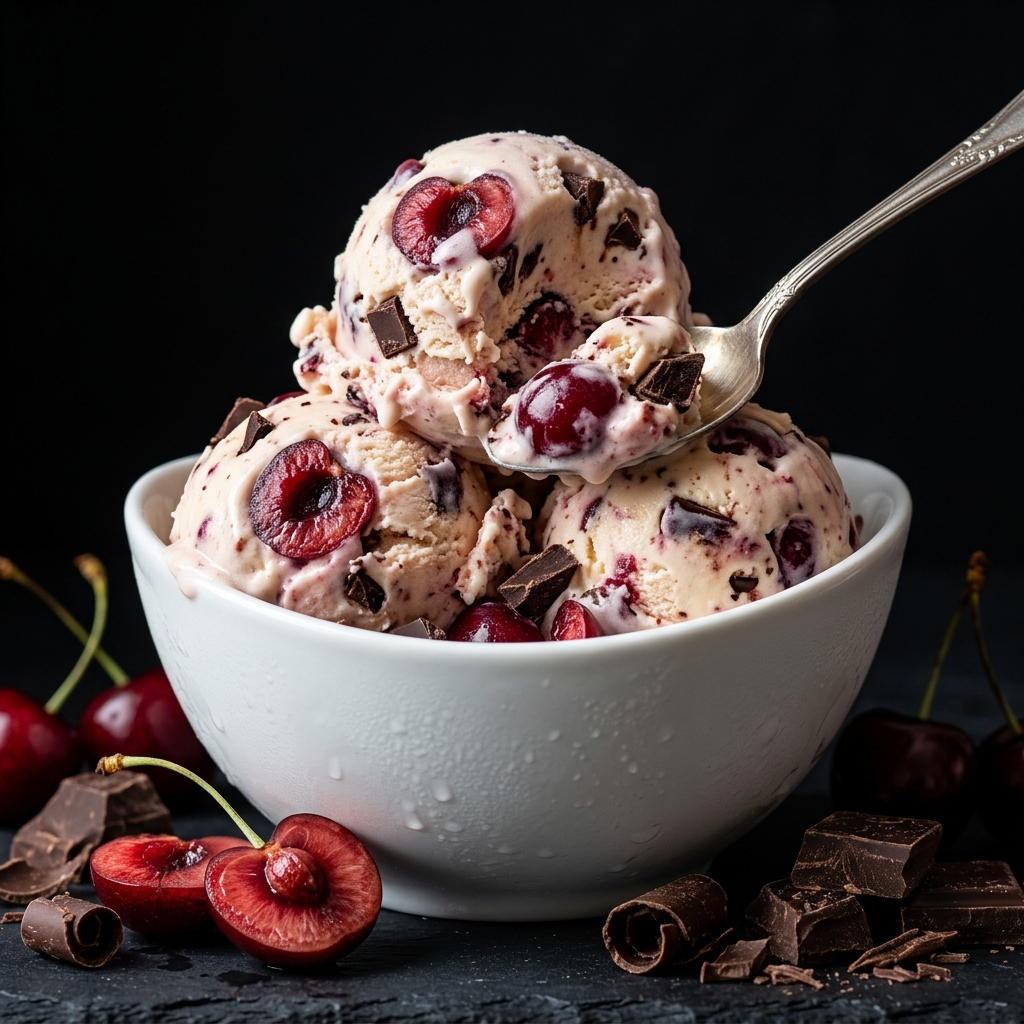
For beautiful presentation, create rounded scoops and arrange them in a chilled dessert bowl or modern white serving dish.
Top with a few cherries and chocolate shavings immediately before serving.
Common Problems and How to Fix Them
Why Is My Homemade Ice Cream Icy?
The most common causes are excess water, insufficient fat, inadequate chilling, or slow freezing.
Cherries naturally contain a lot of water, which is why gently cooking them before adding them to the ice cream is helpful.
Make sure the ice cream base is thoroughly chilled before churning, and avoid substituting low-fat dairy products for the heavy cream and whole milk.
Why Is My Ice Cream Too Hard?
Homemade ice cream can naturally become quite firm after several hours in the freezer.
Commercial ice creams often contain stabilizers and other ingredients that help maintain a softer texture. Homemade versions generally do not.
Allow the ice cream to rest at room temperature for several minutes before scooping. Avoid adding excessive amounts of liquid or reducing the sugar too dramatically, as both can affect the final freezing characteristics.
Why Did My Chocolate Become Too Hard?
Chocolate becomes firm when frozen.
If the pieces are large, they can feel especially hard when you bite into them. Chop the chocolate into small pieces for a more pleasant texture.
You can also use finely chopped chocolate, which distributes tiny chocolate pieces throughout the ice cream.
Why Didn’t My Ice Cream Freeze Properly?
If the ice cream remains unusually soft after several hours, check the temperature of your freezer and make sure the ice cream mixture was thoroughly chilled before churning.
Also consider whether the recipe contained too much liquid or additional ingredients that were not accounted for.
A properly chilled base and a sufficiently cold freezer are essential for good results.
Frequently Asked Questions
Can I Make Cherry Garcia Ice Cream Without an Ice Cream Maker?
Yes, although the texture may be somewhat different.
One option is to use a no-churn ice cream method based on whipped cream and sweetened condensed milk. You can fold in the prepared cherries and chopped chocolate before freezing.
The traditional churned version generally provides a more classic ice cream texture, but the no-churn method can be convenient when you do not own an ice cream machine.
Can I Use Frozen Cherries?
Absolutely.
Frozen cherries are a convenient alternative when fresh cherries are unavailable. Allow them to thaw completely and drain off excess liquid before cooking.
Because frozen cherries may release more moisture than fresh cherries, cooking them until the mixture becomes slightly concentrated is particularly helpful.
Can I Use Chocolate Chips Instead of Chopped Chocolate?
Yes, but chopped chocolate usually provides a better texture and more natural chocolate distribution.
If you use chocolate chips, choose good-quality semisweet or dark chocolate chips. Mini chocolate chips are particularly convenient because their smaller size makes them easier to bite into when frozen.
Can I Use Dark Chocolate?
Yes. Dark chocolate works beautifully with cherries.
A bittersweet dark chocolate creates a more sophisticated flavor profile by balancing the sweetness of the ice cream and cherries. If you prefer a sweeter dessert, semisweet chocolate is an excellent choice.
Can I Reduce the Sugar?
You can adjust the sugar slightly, but be careful about making a large reduction.
Sugar affects more than sweetness in frozen desserts. It also helps control how firmly the mixture freezes. Too little sugar can result in ice cream that becomes excessively hard or icy.
If you want a less-sweet version, make a modest adjustment rather than removing a large portion of the sugar.
Can I Make This Recipe With Dairy-Free Ingredients?
Yes, a dairy-free adaptation is possible.
Use a full-fat plant-based cream and an appropriate dairy-free milk alternative. Coconut-based products can work particularly well because their fat content helps create a creamy frozen texture.
However, the exact result will depend on the fat content and formulation of the products you choose.
Also make sure your chocolate is dairy-free if you need the entire recipe to remain dairy-free.
Is Cherry Garcia Ice Cream Gluten-Free?
The basic ingredients are naturally gluten-free, so this recipe can generally fit a gluten-free diet.
However, packaged ingredients such as chocolate should be checked carefully for their labels and manufacturing information if you need to avoid gluten strictly. Cross-contact can vary between brands.
Is Cherry Garcia Ice Cream Keto or Low Carb?
Traditional Cherry Garcia ice cream is not keto or low carb.
The standard recipe contains granulated sugar as well as naturally occurring carbohydrates from the cherries and dairy.
A low-carb adaptation would require significant changes to the sweetener and ingredient ratios, so it should be treated as a separate recipe rather than simply removing the sugar.
How Long Does Homemade Cherry Garcia Ice Cream Last?
For the best quality, aim to enjoy it within approximately 1–2 weeks when stored properly in a tightly sealed freezer-safe container.
Although it can remain frozen longer, homemade ice cream tends to gradually lose its ideal texture as it sits in the freezer.
A Few Final Chef’s Notes
The most important thing to remember when making Cherry Garcia ice cream is that texture begins with preparation.
Do not rush the chilling stage. Do not add warm fruit to a cold base. Do not overload the ice cream with huge pieces of frozen chocolate. And do not underestimate the importance of properly ripe cherries.
These small details may seem insignificant individually, but together they make a substantial difference.
If you have never made homemade ice cream before, this recipe is a particularly rewarding place to start. You do not need complicated ingredients or advanced pastry techniques. Instead, you need patience, good ingredients, and attention to temperature.
The finished ice cream should be creamy enough to scoop, firm enough to hold its shape, and generously filled with cherries and chocolate.
Why You’ll Keep Coming Back to This Recipe
There is something especially satisfying about opening the freezer and finding a container of homemade Cherry Garcia ice cream waiting inside.
The first spoonful gives you the rich creaminess of the base. Then comes the bright flavor of cherry, followed by little pieces of chocolate that add a satisfying contrast. The combination is familiar enough to feel comforting but special enough to make an ordinary dessert feel like an occasion.
It is also a recipe that can easily become your own.
Make the cherry pieces larger if you love noticeable fruit. Chop the chocolate finely if you prefer little chocolate flecks in every bite. Use dark chocolate for a deeper flavor or semisweet chocolate for a sweeter, more classic dessert. Add a subtle hint of almond extract when you want to emphasize the natural affinity between cherries and almond.
And when summer arrives with beautiful fresh cherries at the market, this is exactly the kind of recipe worth having in your collection.
Final Takeaway
Homemade Cherry Garcia ice cream brings together three ingredients that naturally belong together: creamy dairy, juicy cherries, and rich chocolate.
The key to getting the best result is not complicated equipment or elaborate techniques. It is treating each ingredient properly, especially the cherries. Cooking and cooling the fruit concentrates its flavor while helping control excess moisture, while thoroughly chilling the base gives your ice cream maker the best possible starting point.
Once churned and frozen, you are rewarded with a luxurious dessert that is creamy, fruity, chocolatey, and wonderfully refreshing.
Serve it in a chilled bowl with fresh cherries and chocolate shavings for an elegant dessert, pile it onto a warm brownie for something indulgent, or simply grab a spoon and enjoy it straight from the freezer.
This Cherry Garcia Ice Cream Recipe is the kind of homemade dessert that turns simple ingredients into something memorable—and once you taste the difference between freshly made cherry ice cream and the packaged version, you may find yourself looking for excuses to make another batch.
Cherry Garcia Ice Cream Recipe
Ingredients
Equipment
Method
- Wash, dry, and pit the cherries. Roughly chop them, keeping some pieces slightly larger for texture.
- Place the chopped cherries and ¼ cup sugar in a medium saucepan. Cook over medium heat for about 5–8 minutes, stirring frequently, until the cherries soften and release their juices and the mixture becomes slightly syrupy.
- Remove from the heat and cool completely.
- Transfer the cooked cherries to a covered container and refrigerate until thoroughly chilled. For the best results, chill for at least 1–2 hours or prepare them the day before.
- In a large bowl, whisk together the heavy cream, whole milk, remaining ½ cup sugar, vanilla extract, and optional pinch of salt until the sugar has dissolved completely.
- Stir the chilled cherry mixture and its juices into the cream base. Mix gently until evenly distributed.
- Cover and refrigerate the complete ice cream mixture for at least 2–4 hours, or preferably overnight. The mixture should be very cold before churning.
- Pour the chilled mixture into your ice cream maker and churn according to the manufacturer's instructions, usually for approximately 20–30 minutes, or until it reaches a thick soft-serve consistency.
- During the final few minutes of churning, gradually add the chopped chocolate so it becomes evenly distributed throughout the ice cream.
- Transfer the freshly churned ice cream to a freezer-safe container. For extra cherry and chocolate flavor, layer additional small pieces of cherries and chocolate between scoops of ice cream.
- Smooth the surface, cover tightly, and freeze for at least 4–6 hours, or until firm.
- Allow the ice cream to sit at room temperature for about 5–10 minutes before scooping if it is very firm. Serve with fresh cherries, chocolate shavings, or your favorite toppings.
Notes
Chocolate: Semisweet chocolate creates a classic sweet chocolate flavor, while bittersweet or dark chocolate gives the ice cream a deeper, less-sweet profile.
Don't skip chilling: The ice cream base should be thoroughly cold before churning. This helps the ice cream freeze faster and develop a smoother texture.
Cherry texture: Avoid completely pureeing the cherries if you want recognizable cherry pieces throughout the ice cream.
Chocolate size: Keep chocolate pieces relatively small because large pieces become very firm when frozen.
Storage: Keep the ice cream tightly covered in an airtight freezer-safe container. For the best texture and flavor, enjoy within 1–2 weeks.
Gluten-free: The basic recipe is generally gluten-free, but check packaged chocolate and other ingredients for potential gluten or cross-contact if needed.
Not keto or low-carb: Traditional sugar and cherries make this recipe unsuitable for a standard keto or low-carb diet.
Dairy-free option: For a dairy-free version, substitute full-fat plant-based cream and a suitable dairy-free milk, and use dairy-free chocolate.
Scoopability: If the ice cream becomes very firm, let it stand at room temperature for 5–10 minutes before serving.

Hi, I’m Clara, the creator of Barakala. I love sharing simple, comforting, and delicious recipes that make everyday cooking easier and more enjoyable for home cooks.