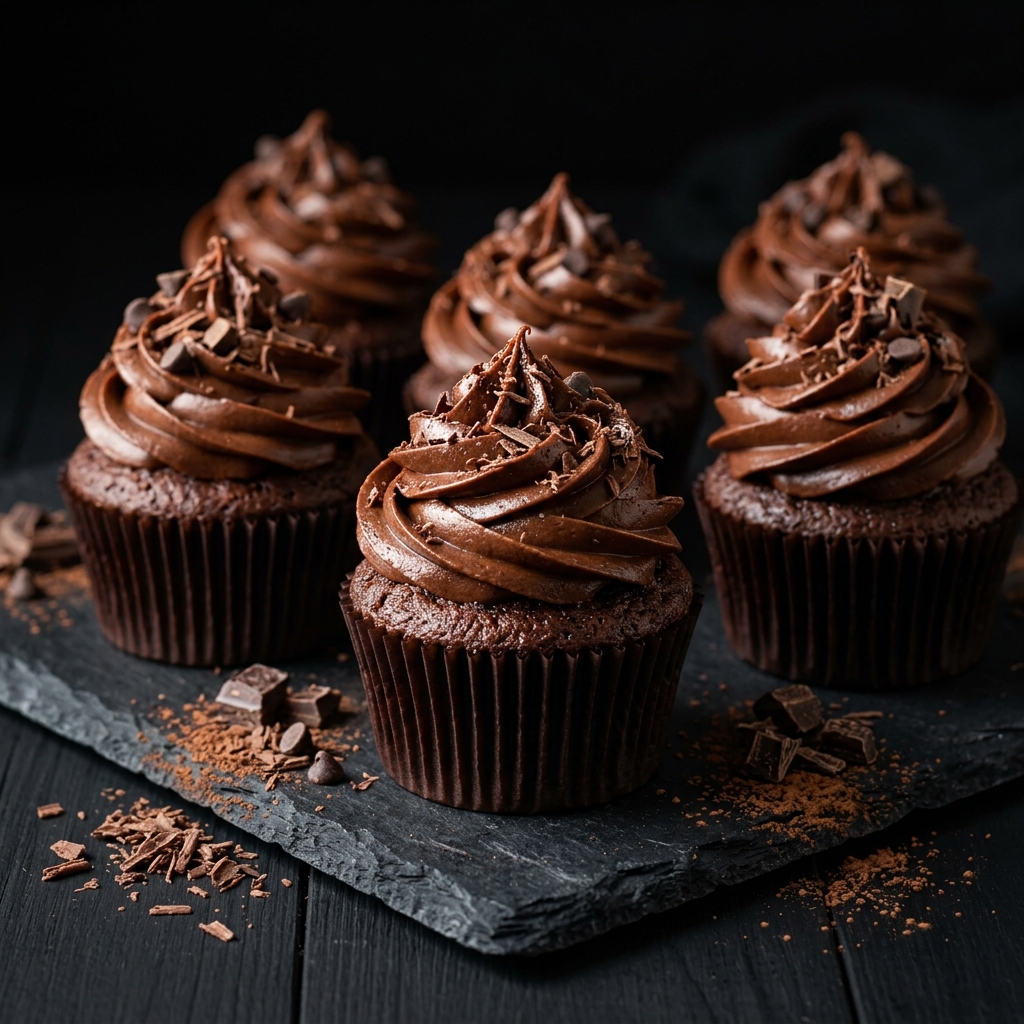
There is something irresistible about a freshly baked chocolate cupcake: soft, deeply chocolatey cake topped with a creamy swirl of frosting and just enough sweetness to make you reach for another. This easy Chocolate Cupcakes recipe creates tender, moist cupcakes with a rich cocoa flavor and a bakery-style finish, making them perfect for birthdays, celebrations, afternoon treats, or whenever a serious chocolate craving strikes.
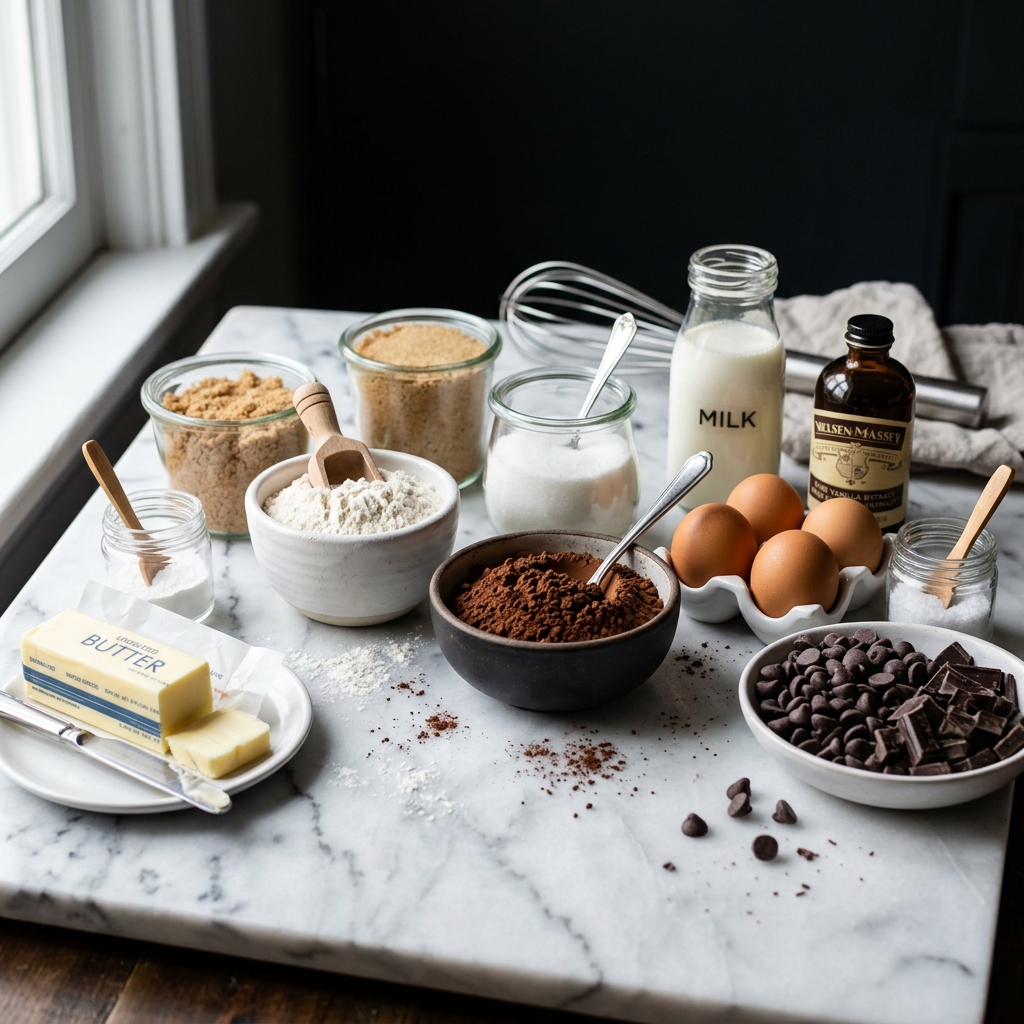
Ingredients for Chocolate Cupcakes
The secret to excellent chocolate cupcakes isn’t simply adding more cocoa. The ingredients need to work together to create a cupcake that is moist, tender, flavorful, and sturdy enough to hold a generous layer of frosting.
For the Chocolate Cupcakes
- 1 cup (125 g) all-purpose flour – Provides the structure for the cupcakes. Measure the flour carefully, preferably by weight, because adding too much can make chocolate cupcakes dense and dry.
- 1/2 cup (45 g) unsweetened cocoa powder – Gives the cupcakes their deep chocolate flavor and beautiful dark color. Use good-quality unsweetened cocoa powder for the best result.
- 3/4 cup (150 g) granulated sugar – Adds sweetness while helping create a tender texture.
- 1/2 teaspoon baking soda – Helps the cupcakes rise and contributes to their soft texture.
- 1/2 teaspoon baking powder – Works alongside the baking soda to give the cupcakes a light, even rise.
- 1/4 teaspoon salt – A small amount makes the chocolate flavor taste richer and balances the sweetness.
- 1 large egg – Adds structure, moisture, richness, and helps bind the ingredients together.
- 1/2 cup (120 ml) buttermilk – Adds moisture and a subtle tang while helping create a tender crumb. If you don’t have buttermilk, you can make a simple substitute by adding 1/2 tablespoon of lemon juice or white vinegar to 1/2 cup of milk and letting it stand for about 5 minutes.
- 1/4 cup (60 ml) vegetable oil – Oil keeps chocolate cupcakes particularly moist because it remains liquid after the cupcakes cool.
- 1 teaspoon vanilla extract – Enhances the chocolate flavor and rounds out the overall taste.
- 1/2 cup (120 ml) hot water or hot coffee – Hot liquid helps bloom the cocoa powder, releasing more of its chocolate aroma and flavor. Coffee won’t make the cupcakes taste like coffee; instead, it can make the chocolate taste noticeably deeper.
For the Chocolate Frosting
- 1/2 cup (113 g) unsalted butter, softened – Creates the creamy base for the frosting.
- 1 1/2 cups (180 g) powdered sugar – Provides sweetness and gives the frosting its smooth, spreadable consistency.
- 1/3 cup (30 g) unsweetened cocoa powder – Adds a rich chocolate flavor.
- 2–3 tablespoons milk or heavy cream – Adjusts the consistency of the frosting.
- 1 teaspoon vanilla extract – Adds another layer of flavor.
- A small pinch of salt – Helps prevent the frosting from tasting overly sweet and brings out the chocolate.
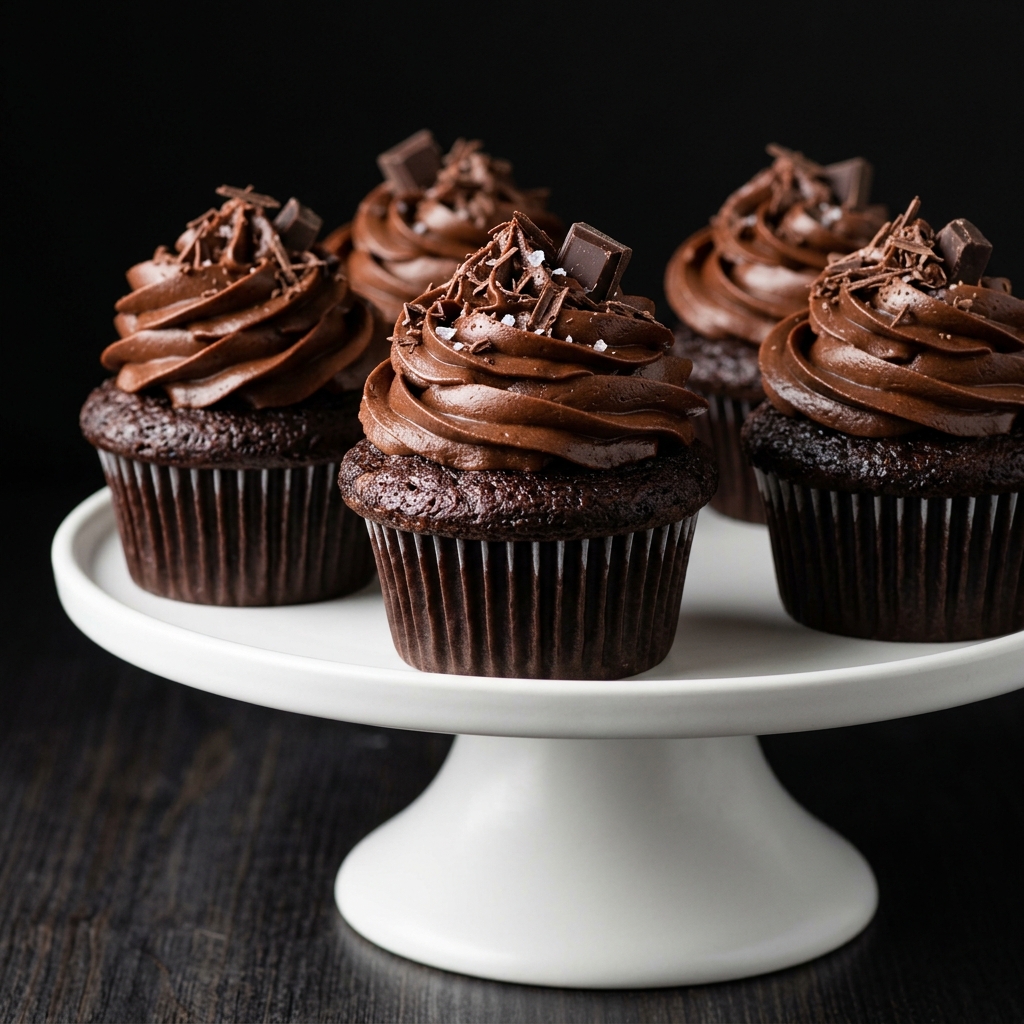
How to Make Chocolate Cupcakes
1. Prepare the Oven and Cupcake Pan
Begin by preheating your oven to 350°F (175°C). Line a standard 12-cup muffin pan with paper cupcake liners.
Preheating the oven properly is more important than it may seem. Cupcakes depend on the initial burst of heat to activate the leavening ingredients and establish their structure. If the oven is still warming when the batter goes in, the cupcakes may rise unevenly or develop a flatter top.
For the most consistent results, allow the oven to fully preheat before placing the pan inside.
2. Combine the Dry Ingredients
In a medium mixing bowl, whisk together the flour, cocoa powder, granulated sugar, baking soda, baking powder, and salt.
Whisking is useful here because it distributes the cocoa powder and leavening agents evenly throughout the flour. You don’t want one cupcake receiving too much baking soda while another receives almost none.
If your cocoa powder is particularly lumpy, sift the dry ingredients instead. This produces a smoother batter and helps prevent pockets of cocoa from remaining in the finished cupcakes.
3. Mix the Wet Ingredients
In a separate large bowl, whisk together the egg, buttermilk, vegetable oil, and vanilla extract until smooth.
The mixture doesn’t need to be beaten aggressively. You simply want the ingredients thoroughly combined.
One reason oil works so well in chocolate cupcakes is that it produces a soft texture without requiring the creaming process used in many butter-based cakes. The finished cupcakes remain pleasantly moist even after cooling.
4. Combine the Wet and Dry Mixtures
Gradually add the dry ingredients to the wet ingredients, gently whisking until the flour is almost incorporated.
At this stage, the batter may look somewhat thick. That’s completely normal.
Avoid overmixing. Once flour becomes hydrated, gluten begins to develop. Too much mixing can result in cupcakes that are chewy or dense rather than soft and tender.
5. Add the Hot Liquid
Slowly pour the hot water or hot coffee into the batter while gently stirring.
The batter will become considerably thinner. Don’t be tempted to add extra flour. This loose batter is exactly what helps produce moist, tender chocolate cupcakes.
If using coffee, make sure it is hot but not aggressively boiling. The goal is to help bloom the cocoa without making the mixing process difficult.
The hot liquid also helps dissolve some of the cocoa particles, allowing the chocolate flavor to spread more evenly through the batter.
6. Fill the Cupcake Liners
Divide the batter evenly among the prepared cupcake liners, filling each one approximately two-thirds full.
Using a cookie scoop or measuring scoop can make this much easier and helps ensure that all the cupcakes bake at approximately the same rate.
Avoid filling the liners all the way to the top. Cupcake batter needs room to expand, and overfilled liners can produce large, uneven domes or cause batter to spill over the sides.
7. Bake the Cupcakes
Place the pan in the center of the preheated oven and bake for approximately 18–22 minutes, or until a toothpick inserted into the center comes out with a few moist crumbs attached.
Try not to open the oven repeatedly during baking. Every time the oven door opens, heat escapes, which can interfere with the cupcakes’ rise.
Because ovens vary, begin checking around the 18-minute mark. A toothpick with a little moist crumb is preferable to one that comes out completely dry. Completely dry cupcakes are often a sign that they’ve been baked slightly too long.
8. Cool the Cupcakes Properly
Remove the pan from the oven and allow the cupcakes to cool in the pan for about 5 minutes.
Then carefully transfer them to a wire rack to cool completely.
This step matters because frosting warm cupcakes is one of the easiest ways to create a messy result. Buttercream can soften or melt when it comes into contact with warm cake, causing the frosting to slide or lose its shape.
Give the cupcakes enough time to reach room temperature before decorating.
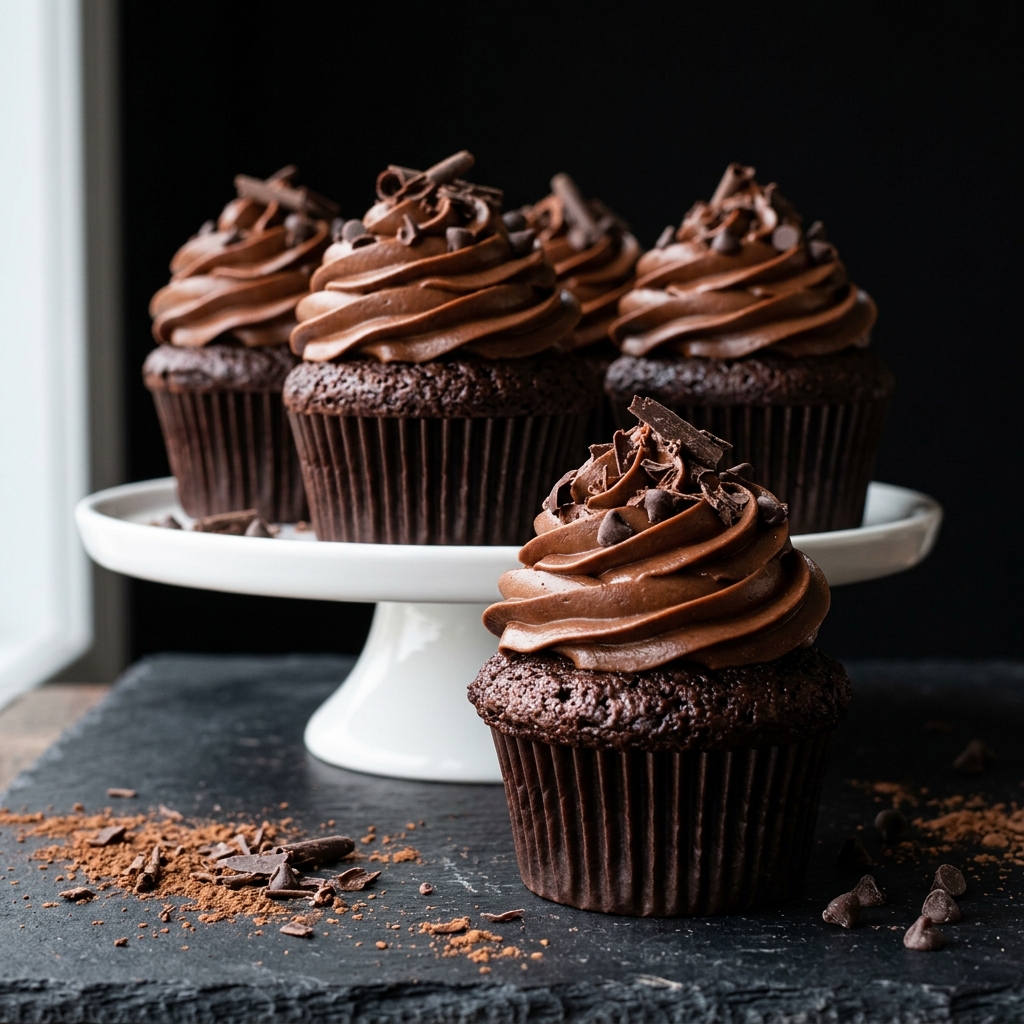
How to Make the Chocolate Frosting
While the cupcakes cool, prepare the chocolate frosting.
1. Beat the Butter
Place the softened butter in a mixing bowl and beat it for about 2–3 minutes until smooth, creamy, and noticeably lighter in texture.
Starting with properly softened butter is important. Butter that is too cold can leave lumps, while butter that is excessively warm can make the frosting greasy and difficult to pipe.
2. Add the Cocoa and Powdered Sugar
Add the cocoa powder and powdered sugar gradually.
Mix on low speed initially to prevent the dry ingredients from flying out of the bowl. Once incorporated, increase the speed and beat until the frosting becomes smooth and fluffy.
3. Adjust the Consistency
Add the vanilla extract, salt, and 2 tablespoons of milk or heavy cream.
Beat again until creamy. If the frosting is too thick, add another small splash of milk. If it becomes too loose, add a little more powdered sugar.
The ideal frosting should be soft enough to pipe easily but firm enough to hold its shape.
4. Frost the Cupcakes
Once the cupcakes are completely cool, transfer the frosting to a piping bag fitted with your preferred decorating tip.
Pipe a generous swirl onto each cupcake, beginning near the outside edge and working toward the center.
For an especially attractive finish, add a few chocolate shavings, miniature chocolate chips, or a light dusting of cocoa powder.
The goal isn’t necessarily to make every cupcake look identical. Slight natural variations can make homemade cupcakes look more inviting and authentic.
The Little Details That Make These Chocolate Cupcakes Special
A good chocolate cupcake should have more than a strong chocolate flavor. Texture is just as important.
When you bite through the frosting and reach the cake underneath, the crumb should feel soft and moist rather than dry or crumbly. The cocoa should taste rich without becoming harsh, while the frosting should provide enough sweetness and creaminess to balance the slightly bittersweet chocolate.
That’s why the combination of cocoa powder, hot liquid, oil, and buttermilk works so well. Each ingredient has a specific job. The cocoa delivers the chocolate foundation, the hot liquid helps intensify that flavor, the oil contributes lasting moisture, and the buttermilk helps keep the crumb tender.
Another important detail is restraint during mixing. It can be tempting to keep stirring until the batter looks perfectly smooth, but cupcake batter doesn’t need excessive mixing. A few small imperfections in the batter are far less damaging than overdeveloping the gluten.
Variations of Chocolate Cupcakes
One of the best things about a classic chocolate cupcake recipe is how easily you can adapt it for different occasions.
Double Chocolate Cupcakes
For an even more intense chocolate experience, fold a small amount of chocolate chips or finely chopped dark chocolate into the finished batter before portioning it into the liners.
The chocolate pieces soften during baking and create little pockets of melted chocolate throughout the cupcakes.
Chocolate Peanut Butter Cupcakes
Add a small amount of creamy peanut butter to the frosting, then finish the cupcakes with chopped roasted peanuts or miniature chocolate-peanut-butter candies.
The salty, nutty peanut butter creates a delicious contrast with the rich chocolate cake.
Chocolate Cupcakes with Ganache
For a more elegant dessert, replace or partially cover the buttercream with a thin layer of chocolate ganache.
Allow the ganache to cool until slightly thickened before spooning or drizzling it over the cupcakes. A small amount of flaky sea salt on top can create a sophisticated sweet-and-salty finish.
Chocolate Mint Cupcakes
Add a small amount of peppermint extract to the frosting for a refreshing chocolate-mint combination.
Use peppermint extract carefully because its flavor can become overpowering very quickly. A little is usually enough.
Chocolate Orange Cupcakes
For a bright variation, add finely grated orange zest to the cake batter or frosting.
Chocolate and orange complement each other particularly well, and the citrus aroma gives the cupcakes a slightly more sophisticated character.
Why Your Chocolate Cupcakes Might Not Turn Out Right
If your cupcakes sometimes come out dry, the first thing to check is baking time. Chocolate cake can be difficult to judge visually because its dark color makes it harder to see subtle changes in doneness.
Overbaking by only a few minutes can make a noticeable difference.
If the cupcakes sink in the center, there are several possible causes. The oven may have been opened too early, the batter may have been overmixed, the leavening agents may have been old, or the cupcakes may have been removed from the oven before their structure had fully set.
If the cupcakes rise beautifully and then collapse dramatically, resist the urge to simply add more baking powder next time. Too much leavening can actually create an unstable structure that rises rapidly and then falls.
Good baking is less about adding more ingredients and more about getting the balance right.
Expert Tips for Perfect Chocolate Cupcakes
- Measure flour accurately. Too much flour is one of the easiest ways to produce dry cupcakes. A kitchen scale gives the most reliable results.
- Don’t overmix the batter. Mix only until the ingredients are combined.
- Use room-temperature ingredients when practical. The egg and buttermilk incorporate more smoothly when they aren’t extremely cold.
- Don’t skip the hot liquid. It helps bring out the flavor of the cocoa and contributes to the characteristic moist texture.
- Don’t overfill the liners. About two-thirds full is generally sufficient.
- Bake on the center rack. This promotes more even heat circulation.
- Don’t frost warm cupcakes. Allow them to cool completely first.
- Taste your frosting before decorating. If it tastes too sweet, a tiny pinch of salt can help balance it.
- Use fresh leavening agents. Baking powder and baking soda lose effectiveness over time.
- Avoid overbaking. Start checking the cupcakes toward the lower end of the suggested baking time.
What Makes These Cupcakes Worth Making?
Chocolate cupcakes are often treated as a simple dessert, but a properly made cupcake has a surprisingly delicate balance. It needs enough structure to hold frosting, enough moisture to stay tender, enough cocoa to deliver a recognizable chocolate flavor, and enough sweetness to make the dessert satisfying without overwhelming the palate.
This recipe aims for that balance while keeping the method approachable for a home baker.
Whether you’re preparing a dozen cupcakes for a family gathering or simply want something special to enjoy with a cup of coffee, these chocolate cupcakes are versatile enough to fit the occasion. The cake can be prepared with straightforward pantry ingredients, while the frosting gives you plenty of room to customize the final appearance.
And once you understand why each step works, you can begin changing the recipe with confidence rather than simply guessing.
Make-Ahead Options
These chocolate cupcakes are particularly convenient when you’re preparing for a birthday, party, holiday gathering, or other occasion because several components can be prepared ahead of time.
Make the Cupcakes Ahead
The unfrosted cupcakes can be baked 1 day ahead. Allow them to cool completely, then place them in an airtight container at room temperature. Keep them away from direct sunlight or heat.
For the best texture, don’t refrigerate plain cupcakes unless necessary. Refrigeration can sometimes make cake seem firmer or drier because the cold environment affects the texture of the fats and starches.
Make the Frosting Ahead
The chocolate frosting can also be prepared ahead of time. Store it in an airtight container in the refrigerator for up to several days.
Before using it, allow the frosting to soften at room temperature and beat it briefly again until smooth and fluffy. If it seems too firm, a small splash of milk or cream can restore the desired piping consistency.
Freeze the Cupcakes
For longer storage, unfrosted cupcakes can be frozen. Wrap them individually or arrange them in a freezer-safe airtight container, protecting them from freezer air as much as possible.
When you’re ready to use them, thaw the cupcakes while still covered or inside their container. This helps prevent condensation from settling directly onto the cake.
For the freshest presentation, prepare the frosting separately and decorate the cupcakes after they have completely thawed.
What to Serve with Chocolate Cupcakes
Chocolate cupcakes are already satisfying on their own, but the right accompaniment can turn them into an especially memorable dessert spread.
Coffee
A freshly brewed cup of coffee is one of the simplest pairings. Its slightly bitter character balances the sweetness of chocolate frosting and can make the cocoa flavor seem even richer.
Milk
For a classic combination, serve the cupcakes with a cold glass of milk. The creamy, refreshing flavor provides a pleasant contrast to the rich chocolate cake.
Fresh Berries
Strawberries, raspberries, and blueberries add freshness and natural tartness. Arrange a few berries beside each cupcake when serving them for a colorful dessert table.
Vanilla Ice Cream
For a more indulgent dessert, serve a warm or room-temperature chocolate cupcake alongside a scoop of vanilla ice cream. The cool, creamy ice cream melts slightly against the cake and creates a delicious contrast in temperature and texture.
Whipped Cream
A small spoonful of lightly sweetened whipped cream can be served alongside the cupcake when you want a softer, less intense alternative to additional buttercream.
Fresh Fruit
Sliced strawberries, bananas, or oranges can brighten the plate and provide a fresh element alongside the rich chocolate.
How to Store Chocolate Cupcakes
Proper storage helps preserve both the texture of the cake and the quality of the frosting.
At Room Temperature
If the cupcakes are fully frosted and your kitchen is reasonably cool, store them in an airtight cupcake container for approximately 1–2 days.
Keep them away from direct sunlight, ovens, stovetops, and other sources of heat. Excessive warmth can soften the buttercream and affect the appearance of the frosting.
In the Refrigerator
If your environment is warm or the frosting contains ingredients that require refrigeration, store the cupcakes in a tightly covered container in the refrigerator.
Before serving, allow them to sit at room temperature for a short period. Chocolate cake generally tastes better when it isn’t extremely cold because the flavors and texture become more pronounced as the cake warms slightly.
In the Freezer
For longer storage, freeze the cupcakes without frosting whenever possible. Place them in an airtight freezer-safe container with parchment paper between layers if necessary.
Frozen unfrosted cupcakes can generally be kept for around 2–3 months for good quality.
Thaw them completely before decorating.
How to Keep Chocolate Cupcakes Moist
Moist chocolate cupcakes don’t happen by accident. Several small decisions throughout the recipe contribute to the final texture.
First, don’t overmeasure your flour. Excess flour absorbs more moisture and can leave the cupcakes heavy and dry.
Second, avoid overbaking. The moment the cupcakes are fully set, they are ready to come out of the oven. A toothpick should ideally show a few moist crumbs rather than emerging completely dry.
Third, don’t leave the finished cupcakes uncovered. Even an excellent recipe can lose moisture when exposed to air for an extended period.
Finally, allow the cupcakes to cool before storing them, but don’t leave them sitting uncovered for hours. Once they’ve reached room temperature, protect them in an airtight container.
How to Get Bakery-Style Chocolate Cupcakes at Home
Professional-looking cupcakes are largely about consistency rather than complicated techniques.
Start by making sure every cupcake receives approximately the same amount of batter. A scoop makes this easier and ensures the cupcakes finish baking at roughly the same time.
Next, focus on the frosting. A smooth buttercream and a consistent piping motion can transform a simple homemade cupcake into something that looks professionally prepared.
Hold the piping bag at a consistent angle and apply steady pressure. Start at the outer edge of the cupcake, pipe a continuous spiral toward the center, then release the pressure before lifting the bag.
If you want a taller, more dramatic frosting swirl, use a larger star-shaped piping tip and build the frosting upward rather than simply spreading it across the surface.
Finally, keep decorations simple. A few chocolate curls, miniature chocolate chips, or a light dusting of cocoa can be more attractive than covering the cupcake with too many toppings.
Common Questions About Chocolate Cupcakes
Why are my chocolate cupcakes dry?
Dry cupcakes are most commonly caused by overbaking or using too much flour. Measuring flour incorrectly can add significantly more flour than the recipe requires.
Always measure carefully and begin checking the cupcakes toward the earlier end of the suggested baking time. Remember that cupcakes continue cooking slightly from residual heat after leaving the oven.
Why did my cupcakes sink in the middle?
A sunken center can happen for several reasons, including underbaking, opening the oven door too early, overmixing the batter, or using ineffective or excessive leavening agents.
Make sure the oven is fully preheated before baking and avoid opening the door during the early stages of baking.
If the cupcakes rise and then collapse, check that your baking powder and baking soda are still fresh and that you’re following the quantities accurately.
Can I use water instead of coffee?
Absolutely. Hot water works well and produces delicious chocolate cupcakes.
However, hot coffee is a useful optional ingredient because coffee can intensify the perception of chocolate flavor without necessarily making the cupcakes taste like coffee.
If you’re serving the cupcakes to people who don’t drink coffee, there’s no need to worry about using it. The finished cupcakes can still have a distinctly chocolatey flavor.
Can I make these chocolate cupcakes without buttermilk?
Yes. If you don’t have buttermilk, you can make a simple substitute by combining milk with a small amount of lemon juice or white vinegar and allowing it to stand for several minutes.
The slight acidity is useful in chocolate cake because it works with the baking soda while contributing to a tender texture.
How do I know when chocolate cupcakes are done?
Insert a toothpick into the center of one cupcake. If it comes out with a few moist crumbs attached, the cupcakes are generally ready.
If the toothpick has wet batter on it, continue baking for another minute or two before checking again.
Avoid waiting until the toothpick comes out completely dry because that can mean the cupcakes have already gone slightly too far.
Can I use melted chocolate instead of cocoa powder?
You can create chocolate cupcakes using melted chocolate, but it isn’t a direct one-to-one substitution for cocoa powder.
Cocoa powder contributes concentrated chocolate flavor without adding the same amount of fat and liquid as melted chocolate. Changing the chocolate source therefore requires adjustments to the other ingredients.
For this particular recipe, unsweetened cocoa powder is the easiest way to achieve the intended balance.
Why does my frosting taste too sweet?
Buttercream naturally contains a significant amount of powdered sugar, but the sweetness can be balanced with cocoa powder, vanilla, and a small pinch of salt.
Make sure you’re using unsweetened cocoa powder rather than sweetened cocoa drink mix.
If the frosting still tastes overly sweet, a tiny additional pinch of salt can help balance the flavor. Add it gradually because too much salt can quickly become noticeable.
Can I decorate these cupcakes differently?
Definitely. Chocolate cupcakes are an excellent blank canvas for decoration.
For birthdays, add colorful sprinkles. For a more elegant presentation, use chocolate curls or delicate chocolate shavings. For a holiday gathering, choose decorations that match the occasion.
You can also pipe different frosting designs using different tips. Even though the underlying cupcake recipe stays the same, changing the frosting technique can make the finished dessert look completely different.
Troubleshooting Your Chocolate Cupcakes
If the cupcakes are too dense
Check whether you accidentally added too much flour or mixed the batter for too long.
Dense cupcakes can also result from old leavening agents. Baking powder and baking soda gradually lose their effectiveness, so freshness matters.
If the cupcakes have a bitter chocolate flavor
Cocoa powder naturally has some bitterness, but the finished cupcake should still taste pleasantly chocolatey.
Check that you used the correct amount of cocoa powder and sugar. Also make sure you didn’t accidentally use an unsweetened chocolate product in place of an ingredient intended to provide sweetness.
A tiny amount of salt can also help round out chocolate flavor.
If the frosting is too soft
Place it in the refrigerator briefly to allow the butter to firm slightly, then beat it again.
If the frosting remains too loose, gradually add a little more powdered sugar until it reaches a pipeable consistency.
If the frosting is too stiff
Add milk or heavy cream a teaspoon at a time, mixing thoroughly after each addition.
It’s much easier to loosen frosting gradually than to correct frosting that has suddenly become too thin.
A Few Final Secrets for Better Chocolate Cupcakes
The difference between an ordinary cupcake and an exceptional one often comes down to details.
Don’t rush the mixing process, but don’t overwork the batter either. Don’t assume that a longer baking time will produce a better cupcake. Don’t decorate until the cake is completely cool. And don’t underestimate the importance of good-quality cocoa powder and vanilla.
Most importantly, learn to pay attention to the batter rather than following the clock blindly. Ingredient temperatures, flour measurement, oven calibration, pan material, and even the humidity in your kitchen can influence the final result.
A good home baker learns to recognize what the batter should look like, how the frosting should feel, and what a properly baked cupcake looks like when it comes out of the oven.
That’s what makes this recipe so useful beyond a single batch. Once you understand the principles, you can apply them to countless other chocolate desserts.
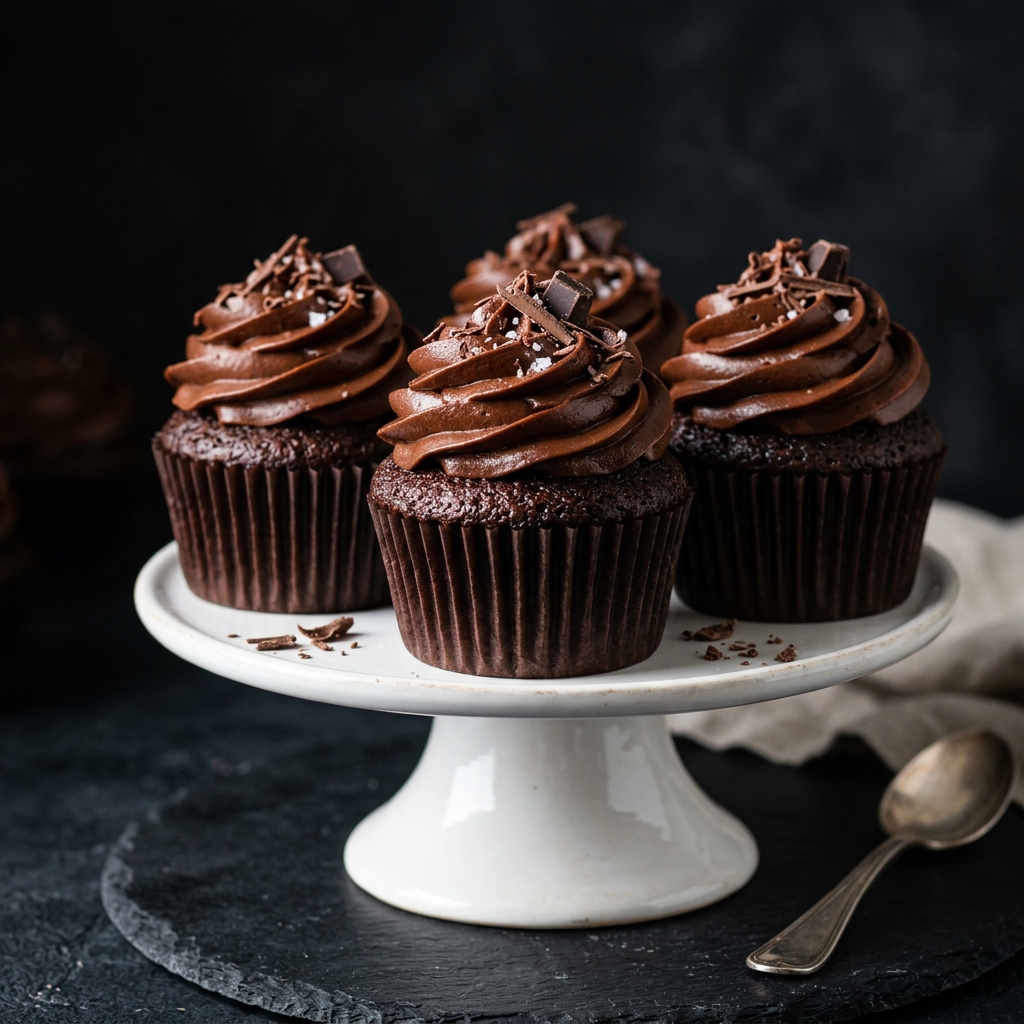
Chocolate Cupcakes
Ingredients
Equipment
Method
- Prepare the oven: Preheat the oven to 350°F (175°C). Line a 12-cup muffin pan with paper cupcake liners.
- Mix the dry ingredients: In a medium bowl, whisk together the flour, cocoa powder, sugar, baking soda, baking powder, and salt until evenly combined.
- Mix the wet ingredients: In a separate large bowl, whisk together the egg, buttermilk, vegetable oil, and vanilla extract until smooth.
- Combine the mixtures: Gradually add the dry ingredients to the wet ingredients. Stir gently until almost combined, taking care not to overmix.
- Add the hot liquid: Slowly pour in the hot water or hot coffee while gently stirring. The batter will become thin; this is normal and helps create moist, tender cupcakes.
- Fill the liners: Divide the batter evenly among the cupcake liners, filling each about two-thirds full.
- Bake: Bake for 18–22 minutes, or until a toothpick inserted into the center comes out with a few moist crumbs attached.
- Cool: Allow the cupcakes to cool in the pan for about 5 minutes, then transfer them to a wire rack. Cool completely before frosting.
- Make the frosting: Beat the softened butter for 2–3 minutes until creamy. Gradually add the powdered sugar and cocoa powder, mixing on low speed until incorporated.
- Finish the frosting: Add the vanilla extract, salt, and 2 tablespoons of milk or cream. Beat until smooth and fluffy. Add a little more milk if the frosting is too thick, or a little more powdered sugar if it is too soft.
- Decorate: Transfer the frosting to a piping bag and pipe a generous swirl onto each completely cooled cupcake. Finish with chocolate shavings, mini chocolate chips, or your preferred decoration.
- Serve: Serve at room temperature for the best cake texture and frosting consistency.
Notes
Don't overmix: Mix the batter only until the ingredients are combined to keep the cupcakes soft and tender.
Don't overbake: Remove the cupcakes when a toothpick shows a few moist crumbs rather than waiting until it comes out completely dry.
Cool before frosting: Warm cupcakes can cause buttercream to melt or slide.
For consistent cupcakes: Use a cookie scoop to divide the batter evenly among the liners.
Storage: Store frosted cupcakes in an airtight container at room temperature for 1–2 days in a cool environment, or refrigerate when necessary.
Freezing: Unfrosted cupcakes can be wrapped well and frozen for up to 2–3 months. Thaw completely before frosting.
Diet information: This standard recipe is vegetarian but is not gluten-free, vegan, keto, or low-carb.

Hi, I’m Clara, the creator of Barakala. I love sharing simple, comforting, and delicious recipes that make everyday cooking easier and more enjoyable for home cooks.