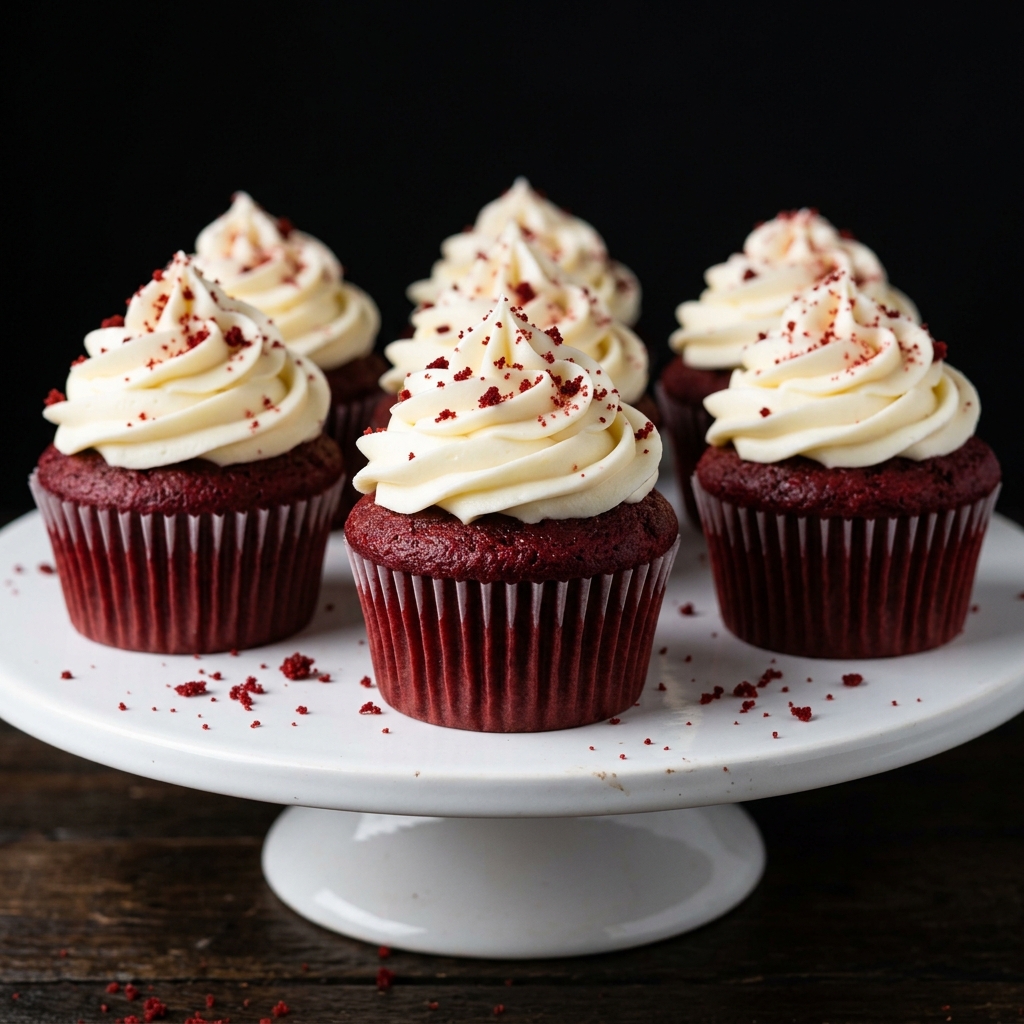
Soft, velvety, deeply red, and crowned with a cloud of tangy cream cheese frosting, these Bakery-Style Red Velvet Cupcakes bring the look and texture of a beautiful pastry-shop treat straight into your kitchen. With a tender crumb, subtle cocoa flavor, and perfectly balanced sweetness, they are the kind of cupcakes that disappear quickly at birthdays, holidays, parties, and special celebrations.
Ingredients for Bakery-Style Red Velvet Cupcakes
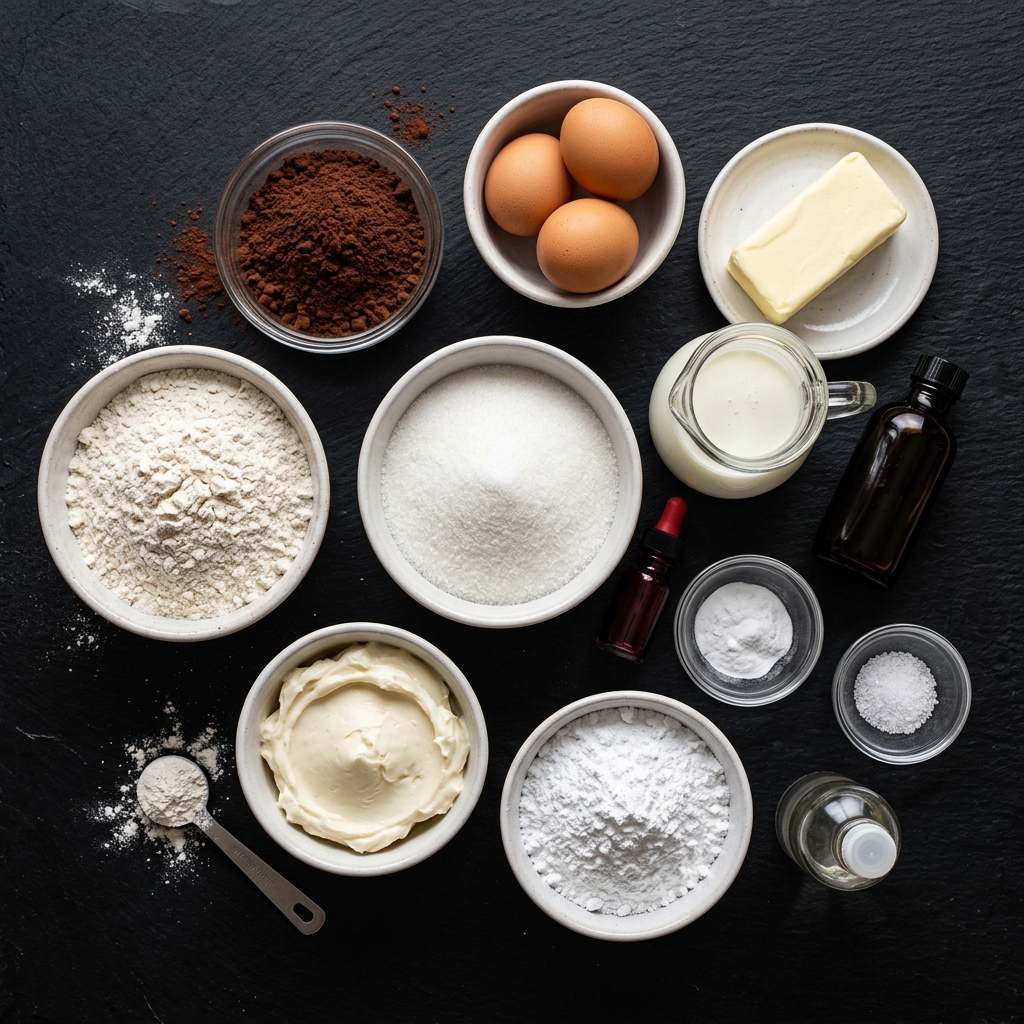
For the Red Velvet Cupcakes
All-purpose flour: Flour provides the structure of the cupcakes. Measure it carefully because adding too much flour can make red velvet cupcakes dense rather than soft. For the most consistent results, spoon the flour into your measuring cup and level it off rather than packing it down.
Unsweetened cocoa powder: Red velvet has a noticeably lighter chocolate flavor than a traditional chocolate cupcake, so a modest amount of unsweetened cocoa powder is all you need. It contributes depth without overpowering the characteristic red velvet flavor.
Granulated sugar: Sugar sweetens the cupcakes while also helping create a tender texture. It contributes to moisture retention, browning, and the overall softness of the crumb.
Baking soda: Baking soda provides leavening and works particularly well with acidic ingredients such as buttermilk and vinegar. Make sure it is fresh for reliable rising.
Salt: Never overlook the salt. A small amount enhances the chocolate and vanilla flavors and prevents the cupcakes from tasting overly sweet.
Unsalted butter: Butter gives the cupcakes richness and a pleasant buttery flavor. Using unsalted butter also allows you to control the amount of salt in the recipe.
Eggs: Eggs provide structure, richness, moisture, and emulsification. Allow them to come to room temperature before mixing so they incorporate more smoothly into the batter.
Buttermilk: Buttermilk is one of the defining ingredients in a classic red velvet recipe. Its gentle acidity contributes to the tender texture and gives the cupcakes their characteristic subtle tang.
Red food coloring: This gives the cupcakes their signature appearance. Gel food coloring is especially useful because it provides strong color without requiring a large amount of liquid.
Vanilla extract: Vanilla rounds out the cocoa and butter flavors and adds warmth to the finished cupcakes.
White vinegar: A small amount of vinegar adds acidity and works with the baking soda. It also contributes to the classic flavor profile associated with traditional red velvet cake.
For the Cream Cheese Frosting
Cream cheese: Use full-fat cream cheese for the richest flavor and most reliable frosting texture. Reduced-fat versions can contain more moisture and may produce a softer frosting.
Unsalted butter: Butter gives the frosting structure and makes it smooth, creamy, and rich.
Powdered sugar: Powdered sugar sweetens and thickens the frosting. Sift it if it contains visible lumps, especially if you want an exceptionally smooth frosting.
Vanilla extract: A little vanilla enhances the cream cheese flavor without competing with it.
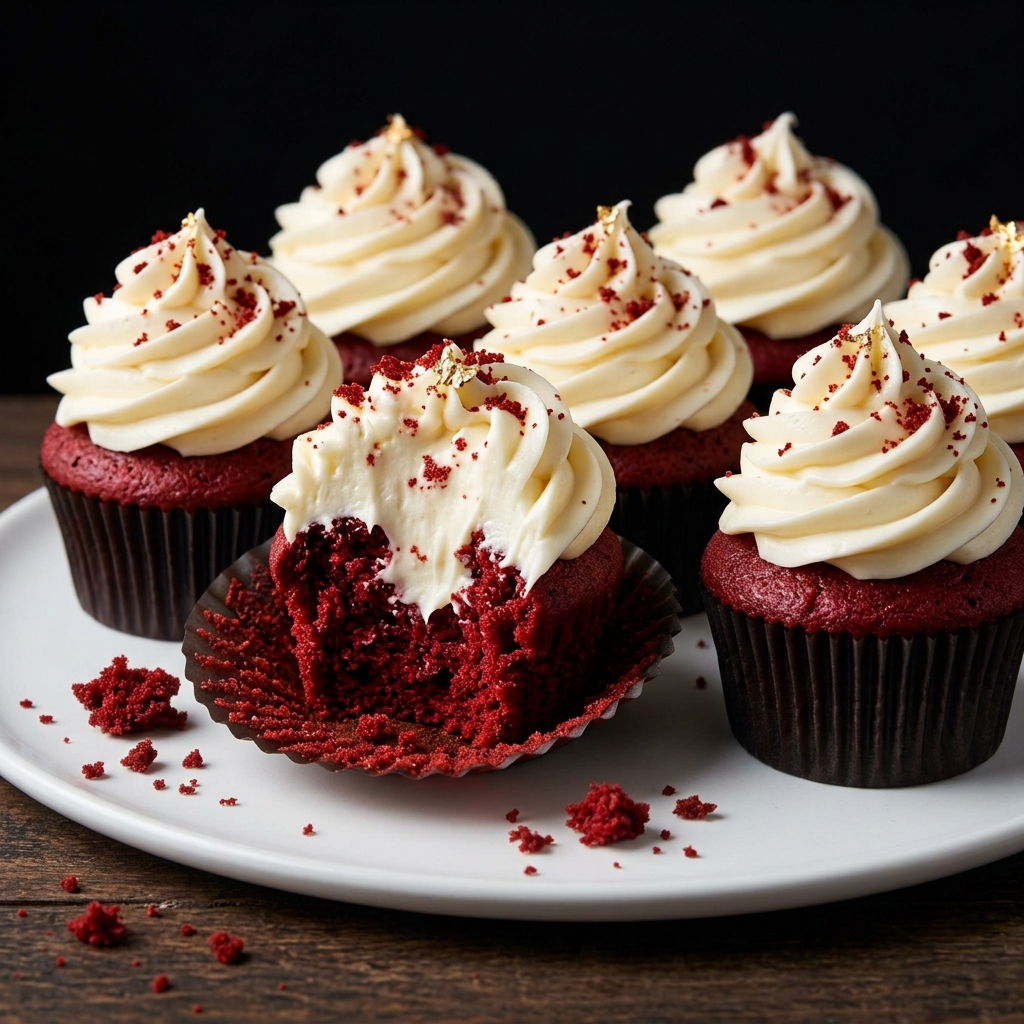
How to Make Bakery-Style Red Velvet Cupcakes
1. Prepare the Oven and Cupcake Pan
Begin by preheating your oven to 350°F (175°C). Line a standard 12-cup muffin pan with cupcake liners.
Preheating is more important than it may seem. Cupcakes depend on the initial burst of heat to activate the leavening agents and establish their structure. Putting the batter into an oven that has not reached the correct temperature can contribute to uneven rising and a heavier crumb.
If you are using a dark-colored metal pan, keep a close eye on the cupcakes because dark pans can absorb more heat and encourage faster browning.
2. Combine the Dry Ingredients
In a medium bowl, whisk together the all-purpose flour, unsweetened cocoa powder, baking soda, and salt.
Whisking does more than simply combine the ingredients. It distributes the cocoa powder and baking soda throughout the flour, reducing the chance of concentrated pockets of either ingredient in the finished cupcakes.
Set the dry mixture aside while you prepare the wet ingredients.
3. Cream the Butter and Sugar
In a large mixing bowl, beat the softened butter and granulated sugar until the mixture becomes noticeably lighter, smoother, and slightly fluffy.
This step introduces air into the butter, which helps contribute to a lighter cupcake texture. Do not rush it, but also avoid excessively beating the mixture after the eggs are added later.
The butter should be softened enough to indent easily when pressed with a finger but should not be melted or greasy.
4. Add the Eggs
Add the eggs one at a time, mixing well after each addition.
Adding them gradually helps the mixture maintain a smooth emulsion. If the batter appears slightly curdled after an egg is added, do not panic. It can happen when the ingredients are at different temperatures. Once the dry ingredients and buttermilk are incorporated, the batter should come together.
Scrape down the sides of the bowl as needed so that everything mixes evenly.
5. Add the Buttermilk, Vanilla, and Red Coloring
In a separate small bowl or measuring jug, combine the buttermilk, vanilla extract, and red food coloring.
The amount of food coloring can be adjusted depending on the strength and type you are using. Gel coloring usually produces a more intense red with less product than liquid coloring.
Add the colored buttermilk mixture gradually to the butter mixture, mixing gently.
At this stage, the batter should begin taking on that unmistakable red velvet color.
6. Combine the Wet and Dry Mixtures
Add the dry ingredients to the wet mixture in portions, alternating with the buttermilk mixture if you have not already incorporated it completely.
Mix only until the ingredients are combined.
This is one of the most important rules for tender cupcakes: do not overmix the batter.
Once flour becomes hydrated, gluten development begins. A little gluten is necessary for structure, but excessive mixing can produce cupcakes that are chewy, dense, or tough rather than soft and delicate.
Stop mixing as soon as you no longer see obvious streaks of dry flour.
7. Add the Vinegar
Add the white vinegar and gently fold or mix it into the batter until evenly incorporated.
The vinegar may seem like an unusual ingredient, but it plays an important role in the chemistry of the recipe. It provides additional acidity that works with the baking soda and contributes to the characteristic red velvet texture and flavor.
There is no need to worry about the finished cupcakes tasting strongly of vinegar. When properly balanced with the other ingredients, it should not dominate the flavor.
8. Portion the Batter
Divide the batter evenly among the prepared cupcake liners.
A cookie scoop or spring-loaded ice cream scoop can make this much easier and more consistent. Aim to fill each liner roughly two-thirds full rather than filling it to the top.
Even portioning is particularly useful when making cupcakes for an event because all of them will finish baking at approximately the same time and have a more uniform appearance.
Avoid overfilling the liners. Too much batter can cause the cupcakes to rise dramatically, spill over the edges, and develop a mushroom-shaped top instead of the attractive bakery-style dome you want.
9. Bake Until Tender
Place the cupcake pan in the preheated oven and bake until the cupcakes have risen, the tops spring back lightly when touched, and a toothpick inserted into the center comes out clean or with a few moist crumbs attached.
Avoid relying solely on baking time. Ovens vary, and cupcake size, pan material, and ingredient temperature can all influence how quickly they bake.
Overbaking is one of the easiest ways to lose the soft texture that makes red velvet cupcakes special. Remove them as soon as they are properly baked rather than waiting for them to become deeply browned.
10. Cool Completely
Let the cupcakes cool in the pan briefly before transferring them to a wire rack to cool completely.
Do not frost warm cupcakes.
This is worth emphasizing because even slightly warm cupcakes can cause cream cheese frosting to soften, slide, or become difficult to pipe neatly. Allowing the cupcakes to cool completely gives the frosting a stable surface and helps preserve those beautiful bakery-style swirls.
The Secret to a Soft, Velvety Crumb
The most important part of a beautiful red velvet cupcake is not actually the color. It is the texture.
When you bite into a properly made cupcake, the crumb should feel soft and tender rather than dry or rubbery. Buttermilk contributes acidity and moisture, while butter adds richness. The eggs help provide structure, and the combination of baking soda and acidic ingredients helps the cupcakes rise.
There is also an important lesson in how you mix the batter. Once flour is added, your goal should change from aggressive mixing to gentle combining. You are no longer trying to make the batter perfectly smooth at all costs. Instead, you want to bring everything together while preserving the delicate structure.
That small change in technique can make a surprisingly noticeable difference.
What Makes Red Velvet Taste Different From Chocolate Cake?
This is where red velvet becomes particularly interesting.
Although cocoa powder is an important ingredient, classic red velvet is not intended to taste like a rich chocolate cupcake. The cocoa is subtle, while buttermilk, vanilla, butter, and the slight acidity from vinegar create a more complex flavor.
The result should be pleasantly cocoa-forward without becoming intensely chocolatey. The cream cheese frosting then adds a creamy, tangy contrast that makes the flavor feel fuller without requiring an excessively sweet cake.
Think of red velvet as a carefully balanced combination of cocoa, vanilla, butter, tanginess, and sweetness rather than simply a red-colored chocolate cake.
Variations to Try
Classic Cream Cheese Red Velvet Cupcakes
For the most recognizable version, keep the traditional cream cheese frosting exactly as intended. Pipe generous swirls over completely cooled cupcakes and finish with a few fine red velvet crumbs for a polished bakery presentation.
Red Velvet Cupcakes With Chocolate Cream Cheese Frosting
If you want a stronger chocolate profile, add a small amount of unsweetened cocoa powder to the cream cheese frosting. The result is richer and more chocolate-forward while retaining the tanginess of cream cheese.
Mini Red Velvet Cupcakes
Turn the recipe into bite-sized treats by using a mini muffin pan and reducing the baking time accordingly. Mini cupcakes are especially convenient for dessert tables, showers, parties, and buffets.
Red Velvet Cupcakes With White Chocolate
For a more indulgent variation, incorporate finely melted and cooled white chocolate into the frosting. White chocolate adds sweetness and richness while creating an especially luxurious pairing with the tangy cream cheese.
Red Velvet Cupcakes With Red Velvet Crumb Topping
Save one cupcake or a small amount of cake trimmings after baking. Crumble the cake finely and sprinkle the crumbs over the frosting. This simple finishing touch makes the cupcakes look professionally decorated without requiring complicated piping skills.
Expert Tips for Bakery-Quality Results
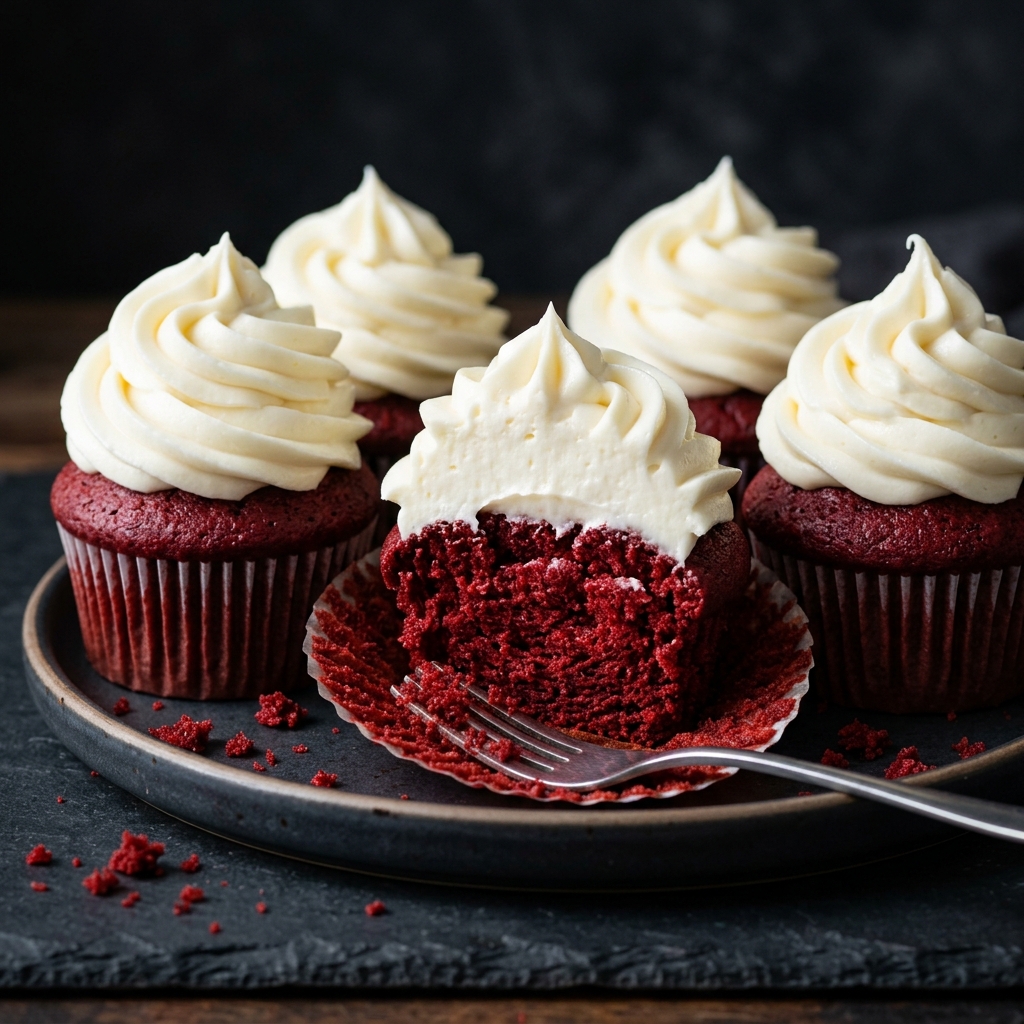
Use Room-Temperature Ingredients
Room-temperature butter, eggs, and buttermilk generally combine more smoothly than ingredients taken directly from the refrigerator.
Cold ingredients can make the butter mixture seize or become uneven, which can affect the final texture.
Measure Flour Carefully
Too much flour is a common reason homemade cupcakes turn out dry.
For the most accurate results, use a kitchen scale when possible. If measuring with cups, fluff the flour first, spoon it into the measuring cup, and level the top with a straight edge.
Don’t Overmix
Once the flour is incorporated, mix only until combined.
A few tiny streaks that disappear with the final gentle mixing are preferable to vigorously beating the batter until it becomes completely smooth.
Don’t Overbake
A red velvet cupcake should be moist and tender, not dry.
Start checking toward the earlier end of the expected baking window. A toothpick with a few moist crumbs is generally a better sign than waiting until the toothpick comes out completely dry.
Choose Good-Quality Cocoa Powder
Because the recipe uses a relatively modest amount of cocoa, its flavor can still make a difference. Use a good-quality unsweetened cocoa powder with a pleasant chocolate aroma.
Use Full-Fat Cream Cheese for Frosting
For a thick, creamy frosting that holds a beautiful piped shape, full-fat block-style cream cheese is preferable to soft spreadable cream cheese sold in tubs.
The tub varieties can contain more moisture, making the frosting noticeably softer.
Cool the Cupcakes Completely Before Frosting
This is perhaps the easiest professional baking habit to adopt.
If the cupcakes are warm, the frosting can soften and lose its definition. If they are completely cool, you can create sharp, attractive swirls that hold their shape.
Don’t Judge the Cupcakes by Color Alone
The finished cupcakes should have a rich red appearance, but the exact shade depends on the cocoa powder and food coloring used.
Focus equally on texture and flavor. A beautiful red cupcake that is dry is not a successful red velvet cupcake. The ideal result is visually striking and soft, moist, tender, and flavorful.
Make-Ahead Options
One of the best things about these Bakery-Style Red Velvet Cupcakes is that several parts of the recipe can be prepared ahead of time, making them much easier to manage when you are baking for a celebration.
The cupcakes can be baked one day ahead and kept tightly covered at room temperature if your kitchen is cool, or refrigerated if necessary. For the best texture, allow refrigerated cupcakes to come back toward room temperature before serving.
You can also prepare the cream cheese frosting ahead of time. Store it in an airtight container in the refrigerator and let it soften slightly before piping. Give it a brief gentle mix if necessary to restore a smooth, spreadable consistency.
For a larger event, you can bake the cupcakes a day ahead, prepare the frosting separately, and decorate them several hours before serving. This approach allows you to focus on presentation without having to complete every step immediately before guests arrive.
If you need to prepare them further in advance, unfrosted cupcakes can also be frozen. Once completely cool, wrap them individually or place them in a freezer-safe airtight container. Thaw them while still wrapped to help prevent condensation from settling directly on the cake.
For the freshest presentation, prepare the frosting separately and decorate the cupcakes after they have thawed completely.
What to Serve With Red Velvet Cupcakes
Red velvet cupcakes are already a complete dessert, but the right accompaniments can make them even more appealing when they are served as part of a larger meal or dessert table.
Fresh Berries
Strawberries, raspberries, and blueberries provide a fresh, slightly tart contrast to the sweet cupcake and creamy frosting. Their natural colors also look beautiful alongside the deep red cake and white frosting.
Fresh Fruit
Sliced strawberries or a simple mixture of fresh berries can add freshness without overwhelming the delicate cocoa flavor of the cupcakes.
Coffee
Coffee is one of the simplest and most satisfying pairings. Its natural bitterness balances the sweetness of the frosting while complementing the subtle cocoa notes in the cake.
Tea
Black tea, chai, vanilla tea, or a lightly flavored herbal tea can work beautifully with red velvet cupcakes. Serve the cupcakes alongside a warm cup of tea for an elegant afternoon dessert.
Vanilla Ice Cream
For an especially indulgent dessert, serve a cupcake with a small scoop of vanilla ice cream. The cold, creamy ice cream contrasts wonderfully with the soft cake and rich cream cheese frosting.
Whipped Cream and Berries
If you are serving the cupcakes as part of a dessert spread, a small bowl of lightly sweetened whipped cream accompanied by fresh berries gives guests another way to build their dessert plate.
How to Store Red Velvet Cupcakes
Because these cupcakes are topped with cream cheese frosting, proper storage is important.
Place the decorated cupcakes in an airtight cupcake container and refrigerate them if they will not be eaten within a short period. The frosting should remain chilled for food safety and quality.
Before serving, allow refrigerated cupcakes to sit at room temperature for a short period so the cake and frosting can soften slightly. This helps bring back the tender texture and full flavor that can become muted when the cupcakes are very cold.
Avoid leaving cream cheese-frosted cupcakes sitting out for extended periods, particularly in a warm environment.
How Long Do They Last?
For the best quality, enjoy the cupcakes within a few days of making them. Over time, the cake can gradually lose some of its fresh, tender texture, while the frosting may absorb moisture and become softer.
If you are preparing them for an event, baking them the day before is an excellent strategy because they can still taste remarkably fresh while giving you plenty of time to decorate and arrange them.
Can You Freeze Red Velvet Cupcakes?
Yes. Freezing is an excellent option when you want to prepare the cake portion ahead of time.
For the best results, freeze the cupcakes without frosting. Allow them to cool completely, then wrap them securely and place them in a freezer-safe container or bag.
When you are ready to use them, thaw the cupcakes while still wrapped. Once completely thawed, prepare or add the cream cheese frosting.
Freezing them unfrosted helps protect the texture and prevents the frosting from becoming damaged during freezing and thawing.
If you do freeze already-frosted cupcakes, make sure they are placed in a rigid freezer-safe container so the frosting does not get crushed or touched by wrapping materials.
Common Red Velvet Cupcake Problems and How to Fix Them
Even experienced bakers occasionally encounter cupcakes that do not turn out exactly as expected. Understanding what went wrong can help you make the next batch even better.
Why Did My Cupcakes Turn Out Dry?
Dry cupcakes are commonly caused by too much flour, overbaking, or inaccurate ingredient proportions.
Measure the flour carefully and avoid packing it into the measuring cup. Also, start checking the cupcakes toward the earlier part of the baking window rather than waiting until they are deeply browned.
Remember that cupcakes continue cooking from residual heat for a short time after leaving the oven, so you do not want to take them too far.
Why Did My Cupcakes Sink in the Middle?
Cupcakes can sink when they are underbaked, when the oven temperature is too low, or when the batter has been overmixed.
Opening the oven repeatedly during the early part of baking can also interfere with the cupcakes as they establish their structure.
Make sure your oven is fully preheated before the pan goes inside and avoid opening the door unnecessarily.
Why Didn’t My Cupcakes Rise Properly?
Check that your baking soda is fresh and that your ingredients have been measured correctly.
The acidic ingredients in the recipe work together with the baking soda to provide leavening, so the balance of the ingredients matters.
Overmixing can also make cupcakes heavier by developing too much gluten.
Why Are My Cupcakes Brown Instead of Bright Red?
The final color depends on several factors, including the cocoa powder, type of food coloring, and amount of coloring used.
Natural cocoa powder and some darker cocoa powders can influence the shade significantly.
For a stronger red appearance, a concentrated gel food coloring is generally more effective than adding large amounts of liquid food coloring.
Why Is My Cream Cheese Frosting Too Soft?
Soft frosting can result from warm ingredients, excessive moisture, or using a spreadable tub-style cream cheese.
Make sure the cream cheese and butter are cool and workable rather than warm. Full-fat block-style cream cheese is generally a better choice for frosting.
If the frosting is too soft to pipe, refrigerate it briefly and then check its consistency again.
Why Is My Frosting Lumpy?
The most common reason is that the cream cheese or butter was not softened evenly before mixing.
Allow the ingredients to soften gradually and beat the butter and cream cheese until smooth before incorporating the powdered sugar.
Sifting powdered sugar can also help if it contains stubborn lumps.
Frequently Asked Questions
What Makes a Red Velvet Cupcake Different From a Chocolate Cupcake?
Red velvet cupcakes contain cocoa, but the chocolate flavor is intentionally subtle. Their distinctive flavor comes from the combination of cocoa, vanilla, butter, buttermilk, acidity, and sweetness.
A traditional chocolate cupcake usually has a much stronger cocoa or chocolate flavor, while red velvet is more delicate and tangy.
Can I Make Red Velvet Cupcakes Without Buttermilk?
Yes, but buttermilk contributes significantly to the characteristic tenderness and tanginess of red velvet cake.
If you do not have buttermilk, you can make a simple substitute by adding an acidic ingredient to milk and allowing it to sit briefly before using it. However, whenever possible, actual buttermilk provides a particularly pleasant flavor and texture.
Can I Use Liquid Food Coloring Instead of Gel Food Coloring?
Yes. Liquid food coloring can be used, although you may need more of it to achieve the same depth of color.
Gel food coloring is generally more concentrated, which makes it useful when you want a vivid red color without adding a large amount of extra liquid to the batter.
Can I Make These Cupcakes Without Cream Cheese Frosting?
Absolutely.
Cream cheese frosting is the classic choice, but you can use vanilla buttercream, whipped cream frosting, white chocolate frosting, or another frosting that complements the mild cocoa flavor.
That said, the slight tang of cream cheese frosting is one of the features that makes the traditional red velvet combination so appealing.
How Do I Get Bakery-Style Cupcakes With Even Tops?
Consistent portioning is one of the most important factors.
Use the same amount of batter in each cupcake liner and avoid filling the liners too high. Make sure your baking soda is fresh and your oven is properly preheated.
A scoop makes portioning much easier and helps every cupcake bake at approximately the same rate.
Can I Make These as Mini Cupcakes?
Yes. The batter can be portioned into a mini muffin pan to create smaller red velvet treats.
Because mini cupcakes bake considerably faster than standard cupcakes, begin checking them early. The exact time will depend on your oven, pan, and the amount of batter in each cavity.
Can I Make This Recipe as a Layer Cake?
The same general red velvet flavor profile can be adapted into a layer cake, although baking time and pan quantities will need to be adjusted.
For a layer cake, divide the batter evenly between prepared round cake pans and bake until the centers are set and a toothpick comes out with a few moist crumbs.
The cream cheese frosting can then be used between the layers and over the outside of the cake.
How to Decorate Red Velvet Cupcakes Like a Bakery
You do not need complicated decorating equipment to make these cupcakes look impressive.
A piping bag fitted with a large open star tip is enough to create beautiful swirls of cream cheese frosting. Start in the center of the cupcake and pipe outward in a controlled circular motion before gradually moving upward.
Finish the swirl by releasing pressure and lifting the piping tip gently.
For an elegant appearance, keep the decoration simple. A few fine red velvet crumbs sprinkled over the frosting can create a beautiful contrast without distracting from the cupcake itself.
You can also add a single fresh berry, a tiny white chocolate decoration, or a delicate dusting of cake crumbs for special occasions.
The goal is not to cover the cupcake with decorations. The rich red cake and creamy white frosting already provide a naturally striking color combination.
A Few Small Details That Make a Big Difference
When you are trying to recreate the appearance and texture of professional bakery cupcakes, it is easy to focus only on the ingredients. Technique, however, is equally important.
Bring your ingredients to the appropriate temperature. Measure carefully. Avoid overmixing. Do not overbake. Allow the cupcakes to cool completely before frosting them.
These may sound like small instructions, but together they are what transform an ordinary homemade cupcake into something that looks and tastes carefully crafted.
Another useful habit is to taste and adjust your frosting before decorating the cupcakes. Cream cheese varies slightly from brand to brand, and the sweetness of powdered sugar can differ depending on the quantity used. The ideal frosting should taste creamy and sweet but still retain enough tanginess to balance the cake.
The Best Way to Serve Them
For the most enjoyable texture, serve these cupcakes when the cake is tender and the frosting is creamy rather than ice-cold.
If they have been refrigerated, give them a little time at room temperature before serving. This allows the butter in the cake and frosting to soften, bringing back more of their natural richness.
For parties, arrange the cupcakes on a modern white serving platter. The contrast between the white frosting, deep red cake, and clean serving surface makes the cupcakes immediately eye-catching.
If you are serving them at a birthday celebration, holiday gathering, bridal shower, Valentine’s Day event, or afternoon tea, simple presentation is often more effective than excessive decoration.
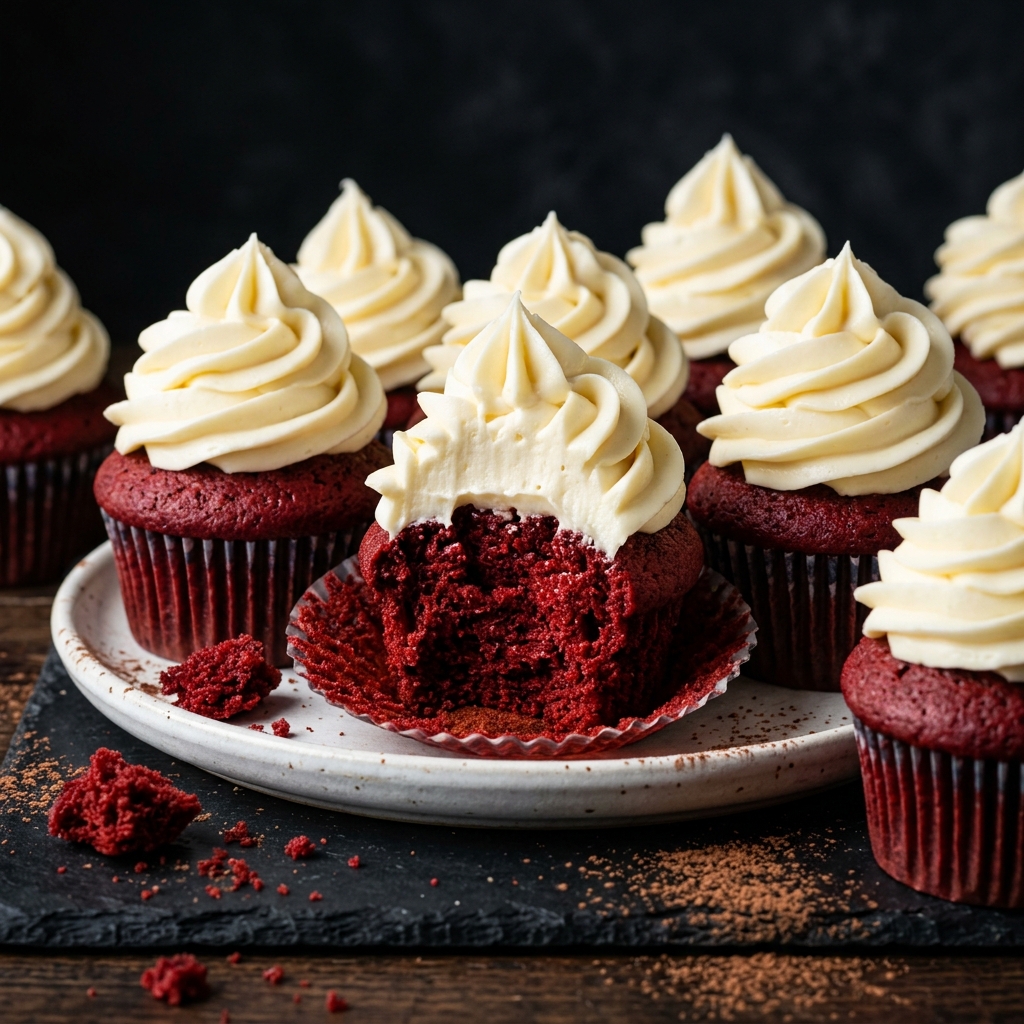
Bakery-Style Red Velvet Cupcakes
Ingredients
Equipment
Method
- Preheat the oven to 350°F (175°C). Line a standard 12-cup muffin pan with cupcake liners.
- In a medium bowl, whisk together the flour, cocoa powder, baking soda, and salt. Set aside.
- In a large mixing bowl, beat the softened butter and granulated sugar until light, smooth, and slightly fluffy.
- Add the eggs one at a time, beating well after each addition. Scrape down the sides of the bowl as needed.
- In a separate bowl or measuring jug, combine the buttermilk, vanilla extract, and red food coloring.
- Gradually add the dry ingredients to the butter mixture, alternating with the colored buttermilk. Mix gently and stop as soon as the batter is combined.
- Add the white vinegar and gently fold it through the batter. Avoid overmixing.
- Divide the batter evenly between the cupcake liners, filling each approximately two-thirds full.
- Bake for 18–22 minutes, or until the cupcakes are risen and a toothpick inserted into the center comes out clean or with a few moist crumbs.
- Let the cupcakes cool in the pan for a few minutes, then transfer them to a wire rack. Allow them to cool completely before frosting.
- Beat the softened cream cheese and butter together until smooth and creamy.
- Gradually add the powdered sugar, mixing until the frosting is smooth and fluffy.
- Add the vanilla extract and beat briefly until incorporated.
- If the frosting is too soft for piping, refrigerate it for about 20–30 minutes until it reaches a firmer consistency.
- Transfer the cream cheese frosting to a piping bag fitted with a large star tip.
- Pipe generous swirls onto the completely cooled cupcakes.
- For a classic bakery-style finish, crumble a small amount of red velvet cake over the frosting or add a few delicate red velvet crumbs as decoration.
- Serve immediately or refrigerate until ready to serve.
Notes
Do not overmix: Once the flour is incorporated, mix only until no obvious streaks of dry flour remain. Overmixing can make the cupcakes dense.
Use gel food coloring: Gel coloring generally produces a deeper red color without adding as much liquid to the batter.
Don't overbake: Remove the cupcakes as soon as a toothpick comes out clean or with a few moist crumbs. Overbaking can make the crumb dry.
Cool completely before frosting: Warm cupcakes can cause cream cheese frosting to soften and slide.
For firm frosting: Full-fat block-style cream cheese works best. Avoid overly soft spreadable cream cheese when possible.
Storage: Store cream cheese-frosted cupcakes in an airtight container in the refrigerator and bring them toward room temperature briefly before serving for the best texture.
Make ahead: The unfrosted cupcakes can be baked ahead and stored tightly covered. They can also be frozen for longer storage, preferably without frosting.
Decorating tip: A large star piping tip creates tall, elegant frosting swirls that give these cupcakes their signature bakery-style appearance.

Hi, I’m Clara, the creator of Barakala. I love sharing simple, comforting, and delicious recipes that make everyday cooking easier and more enjoyable for home cooks.